Showing posts with label dessert. Show all posts

Sunday, February 7, 2016

Key Lime Pie

The other night, we were eating this pie, and the kids asked me to tell them a funny story.  I told them about a story when I was a senior in high school.  My friend Jessi and I were quite the trouble-makers in government class.  Our teacher learned this quickly but never got mad at us.  He would just look at us and say, "Jeesssssiii, Caaaalllllie" and give us a disgruntled expression and a raised eyebrow.  Before the bell rang, he always stood in the hallway and talked to the other teachers.  One day, we had a quiz over the counties of Nevada.  Jessi and I made about 20 copies of the answers and stapled them all over the walls, unbeknownst to him since he was yapping in the hallway.  He came in the classroom, looked around, smirked, and looked right at Jessi and I and said, "Jeessssssiiiii, Caaaaallllliie."  He made us take them down, but we sure thought it was hilarious.

We were having some people over for dinner a few weeks ago, and I asked what they wanted for dessert.  One of them quickly asked if I could make key lime pie.  I had never made or eaten key lime pie, but I was bound and determined to do it.  When I got home, I researched key lime pie recipes for a good hour trying to find one that looked amazing.  I saw one that had a coconut macaroon crust, but I thought that it might be a bit too sweet.  I finally settled on the America's Test Kitchen key lime pie recipe, but I toasted some coconut to sprinkle on top.  Sweet mother of all that is holy.  This is one good pie.

A couple weeks after making this the first time, I made it for another friend.  He said that it was the best key lime pie that he'd ever had and told me that I should work in a bakery.  That made my whole day!


Key Lime Pie
source: America's Test Kitchen: The New Family Cookbook

Graham Cracker Crust:
8 whole graham crackers, broken into 1-inch chunks 
3 T sugar
5 T butter, melted and cooled

Preheat over to 325.  

Place the graham cracker crumbs and sugar in a food processor.  Process until fine.  Add the melted butter and pulse about 5 more times.  

Press into a 9-inch pie plate.  You can use the bottom of a measuring cup to pack the crumbs in.  Bake until beginning to brown, 12-18 minutes.  Remove to cool, but keep the oven on.

Key Lime Pie:
4 large egg yolks
4 t grated lime zest and 1/2 c lime juice (about five limes)
1 14 oz. can sweetened condensed milk

1 c heavy cream
1/4 c powdered sugar

Set oven to 325.

For the pie, whisk the egg yolks and lime zest for two minutes until mixture has a light green tint.  Whisk in the sweetened condensed milk.  Add the lime juice, and whisk to combine.  Let the mixture sit at room temperature for 30 minutes to thicken.

After the 30 minutes is up, pour the mixture into the graham cracker crust.  Bake for 15-20 minutes, or until the center is firm but jiggles slightly.  Cool on a wire rack for one hour.  Cover and cool in the fridge for at least three hours or overnight.  

Before serving, make the whipped cream.  Beat the heavy cream and sugar with a whisk attachment on medium-high speed until soft peaks form, about 2 minutes.  Spread over the chilled pie.

If you want to add toasted coconut, heat a small skillet over medium-low heat.  Add about 1/2 c toasted coconut.  Watch it closely and stir often to prevent over-browning.  Once it's nice and golden brown, sprinkle it over the whipped cream.  

Wednesday, February 3, 2016

The Best Chocolate Chip Cookie

When the rare occasion arises that my kids and I go to Wal-Mart, we like to play Wal-Mart I-spy.  Now, if you've ever been there, especially after dark, you can probably guess what is on the list:


Someone on a motorized shopping cart
Someone wearing camouflage
Someone with a 'Merica shirt on
A mom screaming at her kids
Someone with crazy dyed hair
Someone wearing pajama pants (and slippers for a bonus point)
Someone wearing clothes that are clearly too small


One time when my oldest daughter and I went there, she saw a lady with pink hair, wearing camouflage pajama pants, wearing a shirt with an American flag, and she was screaming at her kids.  Nailed it!  Wal-Mart I-Spy just may revolutionize your shopping trips. 


Now, let me tell you about these cookies.  They really are the best.  The dough has dry pudding mix in them which keeps them ridiculously soft for days.  The original recipe is for Cookies and Cream cookies, which has crumbled Oreos in the dough.  Come on now, who doesn't want to eat an incestuous cookie?  Those are probably my favorite cookie, but sometimes I just want a good ol' chocolate chip cookie.  I used dark chocolate chunks and semi-sweet chocolate chips for the pictured cookie, but you can use whatever chips you've got on hand.  These cookies will never disappoint you, and people will love and hate you at the same time- hopefully, a little heavier on the love side though. 


Make the cookies.  Play Wal-Mart i-Spy.  Thank me later- maybe with a cookie.  :)


Source: http://badtadmd.com/cookies-and-cream-pudding-cookies/
Yield: 2 dozen


3/4 c butter, at room temperature
1/2 c white sugar
1/2 c brown sugar
2 eggs
1 t vanilla
3.5 oz. vanilla instant pudding mix
1 t baking soda
1/4 t salt
2 1/4 c flour
10 oz. chocolate chips (about 1 1/2 c )
If you want something magical, crush up 8 Oreos and add them to the dough in addition to the chocolate chips


Preheat the oven to 350.


In a mixer with the paddle attachment, cream the softened butter and both sugars on medium-high speed until it looks light and fluffy- about 2 minutes.  Lower the mixer speed to medium-low and add the eggs and vanilla.  Mix well to incorporate.  Turn off the mixer.  In a separate bowl, combine the flour, dry vanilla pudding mix, baking soda, flour, and salt.  Whisk to combine.  Turn the mixer on low and add the flour mixture.  Mix well.  Add the chocolate chips.


Use a cookie scoop and plop the dough onto a cookie sheet (about two tablespoons of dough), two inches apart.  Bake the cookies for 12 minutes.


Do not overbake!  These cookies don't brown very much, and they look undercooked after 12 minutes.  However, you take those bad boys out at 12 minutes, let them sit for about 30 minutes, and they're perfect. 

One quick cookie tip- The darker the cookie sheet is, the quicker the bottoms of the cookies bake.  So, if you have one of those really dark-colored cookie sheets, the bottoms of your cookies will be a lot darker and most likely burn.  I use the light colored stainless steel looking cookie sheets.  You can get three in a pack at Sam's club for about $20.  I won't bake cookies on anything else!

These cookies stay soft for about three days, and it tastes like you're eating straight cookie dough- freaking delicious.

Saturday, January 2, 2016

Layered Mint Fudge

I tend to get a little out of control over the holidays with baking.  This year, I spent a good two solid days baking 8 different things.  I made toffee, caramels, homemade thin mints, turtle shortbread cookies, Oreo caramel candy, chocolate and vanilla spritz cookies, one other thing that I forgot, and this layered mint fudge.  My husband requested this, and it is a great fudge recipe!  I only use 1/6 the amount of peppermint that the recipe calls for because I don't really enjoy too much peppermint flavor.  I think it turned out wonderfully!


Layered Mint Fudge
recipe source: http://www.tasteofhome.com/recipes/layered-mint-fudge

1 1/2 t butter, softened
2 c chocolate chips
14 oz. sweetened condensed milk, divided
2 t vanilla
1 c white baking chips
1/2 t peppermint extract (original recipe was 3t, but I thought 1/2 t was perfect)
1-2 drops green food coloring

Line a 9-inch square baking pan with foil and spread the butter all over it.

Place the chocolate chips and 1 c of sweetened condensed milk in a large, heavy saucepan over low heat.  Cook and stir over low heat until the chocolate chips are melted.  Remove from heat and add the vanilla.  Mix well.  Pour half of this mixture into the prepared pan.  Place in the refrigerator for about 10 minute to harden.

Meanwhile, melt vanilla chips and the remaining sweetened condensed milk in a different saucepan over low heat or until the chips are melted.  Remove from heat; add the peppermint and green food coloring.  Spread this over the first layer.  Refrigerate for 10 minutes.

Heat the remaining chocolate mixture over low heat and cook until it's reached spreading consistency.  Remove the fudge from the fridge and spread the remaining chocolate mixture over the green peppermint layer.

Cover and refrigerate overnight or until firm.  Cut into 1 inch squares.

My Favorite Toffee

My mom has been wanting a family picture for years.  Every year, something happens so we can't get a nice picture.  Well, this year it finally happened.  After opening presents, she pulled out a big gift bag with a bunch of Star Wars shirts in it.  Yes, we are all quite nerdy.  It's not just me.  We all found a shirt that fits, and we headed over to my brother's photography studio where he works.  She wanted a big backdrop with stars.  We busted out the kids' light sabers, Star Wars masks, and took some pictures.  I don't dare share it here because it will land on the awkward family photos website for years to come.  Being that my family is not only nerdy but our sense of humor is out of control, we had way too much fun taking the pictures.  We did some serious ones, and then we did goofy pictures.  My dad, love him to pieces, isn't the most smiley person you've ever met.  After taking a couple shots were he wasn't smiling, we decided that we should turn him into the Emperor.  We draped a black cloth over his head, and he didn't even crack a smile. I was pointing a toy gun off into the distance with an angry look on my face, my oldest brother kneeled down in front with a Storm trooper mug, his fiancee was smiling and ready to strike him down with a light saber.  Everyone had the most ridiculous pose.  I still laugh at the picture every time I look at it.

If you want to see my dad smile, give the man some toffee, and for an extra big smile, put on Cops for him to watch while he eats it.

Oh, toffee.  Toffee, toffee, toffee.  This stuff is fantastic, and it is so quick to make.  My dad expects a batch of this from me every year.  When he came over on Christmas morning, I gave him a box full of the stuff.  He nibbled, quite ravenously, on several pieces before any one else came over.  He set the box on table.  When others started to come, he said, "Callie!  Hurry!  Get that toffee off the table so no one else gets to it."  I can't say I blame him!  This stuff really is fantastic.  It takes about 10-15 minutes from start to finish.  It needs time to cool, of course, but that is hands-off.  Don't be scared to make it!  Get a candy thermometer and give it a shot.  Your friends and family will love and thank you.

One of my friends once asked me why I bake for people.  As cheesy as it sounds, I absolutely love to do it.  I know how happy I am when I am eating something sweet.  It makes a crappy day a whole lot better when someone gives you something homemade.  I hope that by doing that for people, it can make their day a little better, too.  :)


Recipe source: http://www.theyummylife.com/Toffee

Ingredients:
1 c almonds or pecans
1 c butter
1 c sugar
1/4 t salt
1/2 t vanilla
2 c chocolate chips
1/4 c finely chopped pecans

Place the almonds in a single layer on a plate.  Microwave them for two minute, stirring after each minute.  On a foil lined 9x13 pan, pour the almonds into this and spread them out.

In a heavy, large saucepan, add the butter, sugar, vanilla, and salt.  Stir over medium-high heat until the butter is melted.  Keep the heat on medium-high and continue cooking for 7-10 minutes.  If you have a candy thermometer, it needs to get up to 290-300 degrees.  The color will start to darken.

When it is ready, it will be a darker, amber color- about the color of the almonds.  It will also start to smoke a little bit.  Once it gets to the right color or temperature (whichever way you're doing it), pour the mixture over the almonds.  Sprinkle the chocolate chips over the hot toffee, let them sit for one minute, then spread them with a rubber spatula.  Once they are all smooth and spread over the toffee, sprinkle the finely chopped pecans on top, covering the area of the toffee.

Let it cool completely and break it into pieces.  Store in an airtight container.

Saturday, December 12, 2015

Red Velvet Cake Cheesecake

Upon sending this picture to my brother, he sent five different texts:

What

Is

That

???

!!!!

When I told him, he said, "Yeah, it's time for you to open a bakery."  I wish I could!  It's my dream!  This Red Velvet Cake Cheesecake was all that I hoped it would be and more.


Oh, friends... I have previously mentioned that I don't eat pumpkin pie on Thanksgiving.  The reason being... this.  This red velvet cake cheesecake.  This was ah-maz-ing.  Our friends came over for Thanksgiving dinner, and the husband saw this and said, "Um.. this looks like a professional store-bought dessert."  He later said, "One day, I'm going to be going into a store to see you walking out with a bunch of desserts that you claim to make on your own."  Not gonna happen!  Everyone was in a sugar Valhalla with this one.  Was it time-consuming?  Yes.  Was it worth every second?  Absolutely!

I made this again for a few friends to split, and one of the guys said that he was cursing m name with every bite because he couldn't resist it!  It really is an amazing dessert.


Just look at that.  There is a chocolate ganache layer on top of the Oreo crust as well as between the cheesecake and red velvet layer.  Cream cheese frosting is draped atop the red velvet cake layer.  That is garnished with more chocolate ganache and whipped cream sprinkled with Oreo crumbs.  Sweet mother of all that is holy.  Get in my belly!

Source:
red velvet layer (which is the best red velvet cake recipe you'll ever make):
http://www.food.com/recipe/he-proposed-red-velvet-cake-443640

cheesecake layer:
http://willowbirdbaking.com/2011/01/24/red-velvet-cheesecake/

Cream cheese frosting:
http://www.dessertnowdinnerlater.com/2014/08/best-cream-cheese-frosting-recipe/

Phew.  Get ready.  If you're not in the mood to spend hours on an amazing dessert, head to your closest bakery.  :)

Red Velvet layer ingredients:

1 c flour
1/2 t baking soda
1/2 t baking powder
1/2 t salt
1 T cocoa powder
1 c sugar
1/2 c vegetable oil
1 egg
1 c buttermilk
2 t vanilla
2-3 oz red food coloring
1 t white vinegar
1/2 c coffee

Cheesecake layer ingredients:

crust:
32 Oreo cookies, finely crushed
5 1/3 T butter

Filling:
3 (8 oz.) packages of cream cheese, softened to room temperature
1 c sugar
1 1/2 T flour
2 t vanilla
3 eggs, room temperature

Ganache:
3/4 c heavy whipping cream
10 oz. semi-sweet chocolate chips

Cream Cheese Frosting:
8 oz cream cheese
1/2 c butter, room temperature
1 c powdered sugar
1 t pure vanilla extract

First, make the red velvet layer:

Preheat the over to 350.

Prepare a 9 inch cake pan.  Cut a piece of parchment paper to fit on the bottom of the pan.  Spray the parchment and sides of the pan with Pam.

In a medium bowl, whisk together the flour, baking soda, baking powder, salt, and cocoa powder.

In another large bowl, combine the sugar and oil.  Mix well.  Add in the egg, buttermilk, vanilla, and red food coloring.  Mix well.  Add in the coffee and vinegar.  Do not leave those out!

A little at a time, pour the flour mixture into the sugar, gently beating until well combined.

Pour into the prepared pan and bake for 30-40 minutes or until a toothpick inserted in the middle comes out clean.  Set aside to cool.

Cheesecake layer:

Melt the butter in a medium bowl.  Add the finely crushed Oreo crumbs and mix well.  Press into a 9 inch springform pan.  Press into the bottom and all the way up the sides as well.

For the ganache, place the chocolate chips in a bowl.  Bring the cream to a simmer in a small saucepan over medium heat.  Once it starts to bubble on the sides, pour it over the chocolate chips.  Let the hot cream rest of the chips for 2-3 minutes.  Stir until smooth.

Pour 1/2 of the ganache over the uncooked Oreo crust.  Freeze for thirty minutes, or until the ganache is firm.

For the cheesecake filling, cream the cream cheese and sugar in your mixer with the paddle attachment.  Beat it on medium-high speed until it's smooth and creamy.  Add in the flour, beat well.  Add in the vanilla, mix well.  Add in the eggs, one at a time, beating well after each addition.  Pour this mixture into the springform pan.  Place the pan on a cookie sheet.  Bake at 350 for 1 hour or until the top is puffy and slightly browned.  The center should jiggle only slightly when the pan is shaken.  If the whole thing still jiggles, bske it longer.  I think I ended up cooking it for 1 hour and 20 minutes.  Let it cool at room temperature for 30 minutes.

Once it's cool, top with the remaining ganache.  Remove the red velvet layer from the pan and place it on top of the ganache on the cheesecake layer.

Cream Cheese Frosting:
Beat the cream cheese in a mixing bowl with the whisk attachment on medium-high speed until fluffy.

Add the butter, two tablespoons at a time, beating well after each addition.

Turn the mixer off.  Add the vanilla and powdered sugar.  Turn mixer to low to incorporate everything.  Stop mixing once it is all blended.

Spread the cream cheese frosting on top of the red velvet cake layer.  I didn't use all the frosting in thus recipe.  Maybe save the remaining frosting for some cinnamon rolls the next day.

Garnish the top however you'd like!  I piped some ganache on top, added some whipped cream around the edges, and sprinkled on some Oreo crumbs.  Get creative.  Whatever you do will be delicious.

Sunday, November 22, 2015

Lemon Truffle Pie

My mom requested a lemon dessert for her birthday last week.  I scoured my hundreds of pins on pinterest looking for just the right thing.  I came across this lemon truffle pie and started salivating.  Only lemon things and Frank's Red Hot buffalo sauce can make me salivate just by thinking of it.  Maybe I should combine the two.  Nah.  Better left apart.  However, buffalo chicken fingers for dinner and this for dessert may just send my salivary glands into overload.

Anywho, I took this pie over to my brother's house where we were getting together for my mom's birthday.  We all ate dinner and sat down to play some games.  We were playing for about an hour, and I could sense my dad getting a little restless.  He finally bursted out, "Is it time for dessert yet?!  How long does that game last?!" I dished up the pie and served my dad first because, even in my 30's, I am a daddy's girl.  I heard a loud moan followed by, "Oh, my gosh, Callie!!  This pie!"  Everyone else was served up shortly thereafter, and there was not a crumb left on anyone's plate but my three year old's because she doesn't eat much of anything.  One of my brothers said, "Why is it that everything you make is the best of that dessert that I've ever tasted?!"

This pie is great because it is lemony, cream cheesy, delicious, and no bake.  You can whip it up in about 20-30 minutes, and everyone will love it!
Lemon Truffle Pie:
source: https://doublebatch.wordpress.com/2011/02/20/lemon-truffle-pie/
adapted from Lion House Pies

1 graham cracker crust (see below) or baked 9-inch pie shell
3 tablespoons cornstarch
1/3 cup sugar plus 1/4 cup sugar, divided
1 1/2 cups water
5 tablespoons lemon juice
zest from 2 lemons
4 egg yolks, beaten
1 1/2 tablespoons butter
1 cup white chocolate chips
2 (8-ounce) packages cream cheese, room temperature
1 cup whipped cream
1/3 cup sugar
1/2 teaspoon vanilla extract

In a medium saucepan, combine the cornstarch and 1/3 c sugar.  Add the water and stir.  Add in the lemon juice and lemon zest.  

In a bowl, beat the egg yolks with a fork.  Add the 1/4 c sugar and mix it in.  Add the egg yolk mixture to the mixture in the saucepan and whisk well.  Cook over medium heat, stirring constantly.  Once it boils, cook it for one minute- continuing to stir constantly.

Remove the saucepan from the heat.  Add in butter and stir until melted.  Reserve 1 1/2 c of the lemon liquid for the top layer.  Add the 1 c of white chocolate chips into the remaining lemon mixture in the saucepan.  Stir until they are melted and well mixed in.  Cut the cream cheese into small cubes and add to the mixture in the  saucepan.  Stir until they are well mixed in and no chunks remain.  (I put mine in a stand mixer with a whisk attachment and beat it on medium speed until it was light and fluffy.)

Pour this mixture into the graham cracker crust.  Smooth it out.  Pour the reserved 1 1/2 c of lemon mixture on top of this.  Chill for at least two hours.

Just before ready to serve, whip the cream until stiff peaks form.  Add 1/3 c sugar and vanilla.  Mix well.  Spread the whipped cream over the top of the pie.  


Friday, September 18, 2015

Ultimate Double Chocolate Brownies

I have a dear friend Carrie that recently tore some tendon in her knee that I didn't even know existed.  She was stuck at home (except for a quick trip to Wal-mart where she got to ride around on one of those motorized shopping carts.  Disclaimer- only a couple people were injured during her little off-roading Rascal escapades in Wal-Mart).  I thought I'd take her some homemade chocolate ice cream one night.  When I came in, her mom was there to help with the family.  
She said to her mom, "Mom, do you recognize the name Callie Frank?  Remember the family reunion by the treehouse?"  
The mom said, "Oh, the really good baker?"  
Carrie then raised an eyebrow at me and proceeded to tell me that my name is basically a swear word at her house because her kids are always saying, "I bet Callie can make these better."  
Her kids don't know how good they've got it!  She's amazing!  In fact, she repaid the ice cream visit with a loaf of homemade bread that was the best I've ever tasted!

One more thing- Carrie has dissed on homemade brownies claiming that they are never as good as boxed brownies.  Challenge accepted, my friend!  I made these and had to get one over to her because they blow boxed brownies out of the water and up to the moon.  She texted me the next day and said, "Fine!  You win!  Now you have to share the recipe with me!"  So, here it is.  The infamous brownie that won Carrie over.  It really is perfect.  You can cut the amount of chocolate chips in half to be a little less sweet, but who really wants to do that?!  

Enjoy the World's Best Brownie.  


Ultimate Double Chocolate Brownies

Ultimate Double Chocolate Brownies
recipe and photo source: http://moneysavingmom.com/2013/10/ultimate-double-chocolate-brownies.html

Ingredients:
  • ¾ cup cocoa
  • ½ teaspoon baking soda
  • 2/3 cup melted butter, divided
  • ½ cup boiling water
  • 2 cups sugar
  • 2 eggs, slightly beaten
  • 1 1/3 cups flour
  • 1 teaspoon vanilla
  • ¼ teaspoon salt
  • ½ cup chopped pecans, optional
  • 12 oz. package chocolate chips
Preheat the oven to 350 degrees.

In a large bowl, combine the cocoa and baking soda.

Stir in 1/3 of the melted butter.  Add the boiling water.  Stir until blended.

Stir in the sugar, eggs, and remaining butter.   Mix well.  Add the flour, vanilla, salt, pecans (if using) and chocolate chips.

Pour into a 9/13 pan.  Bake for 35-40 minutes.


Wednesday, August 19, 2015

Triple Lemon Cheesecake

Do you ever have those "when it rains, it pours" moments.  Well, we've had one of those years.  Here are some things that we have to to fix/replace/pay for in the past few months:
Garage Door repair- $360
New tires- $500
New wheel- $160
Dental insurance mishap- $650
Oven repair- $320

Then, flashback to the week of my birthday.  I was trying to re-string my guitar that I got almost 20 years ago.  In some weird freak accident, one of the strings got caught and stuck.  I busted out my MacGuyver hat and tried every means possible to get that darn string out of there.  Every... means... possible.  All to no avail.  I was out a guitar, and it broke my heart!   That thing is a part of me.  Two days later, my phone just randomly shuts off.  I plug it in, and it vibrates, flashes the word "Google" and shuts off.  Over and over and over again.  All night long.  I tried a soft reset, a hard reset, removing the non-removable battery.  Nothing.  Vibrate.  Google.  Off.  Vibrate.  Google.  Off.  AHH!  I wake up on my birthday all bummed that my phone and guitar are no more.  I decide to go to T-mobile and get another phone that isn't too fancy.  I'm simple with things like that.  I got a new phone and was feeling pretty good.  Later, we went to Grimaldi's and met all of my family there for a birthday dinner.  Grimaldi's always makes me happy.  :)  At the end of dinner, my dad asks my brother to go get a box out of their car.  He comes back in with a guitar!  I wanted to cry because I was so excited.  It's a beautiful new Classical guitar, and I adore it!  It's absolutely beautiful.  A pretty crummy week turned out fabulous.

I made this cheesecake for my birthday cake, and we invited everyone over to have some.  It's a good thing because I would have eaten the entire thing in a couple sittings.  It was so amazing.  I'm salivating just thinking about it.  It may be one of the better cheesecakes that I've ever made.  I'm on a cheesecake kick which is dangerous because I'm trying not to eat sweets.  This is worth every calorie and fat gram.  I may have to make it again soon because it was so ridiculously good.

Triple Lemon Cheesecake
source: http://www.gratefulprayerthankfulheart.com/2012/01/triple-lemon-cheesecake.html

Ingredients:
1 1/2 cups graham cracker crumbs 6 tablespoons unsalted butter, melted 1 cup granulated sugar 1 tablespoon lemon zest, finely grated 3 (8 ounce) packages cream cheese, room temperature 1 cup sour cream 2 tablespoons lemon juice, fresh squeezed 3 large eggs 1/2 cup lemon curd, store bought or follow the recipe below 

Homemade lemon curd:
3/4 cup sugar
3 eggs
1 egg yolk
1/2 cup fresh lemon juice
grated rind from 2 lemons (I used about 2 rounded Tablespoons)
1/2 cup butter, melted and cooled slightly

Whipped cream

Instructions:

Preheat the oven to 350.

Butter the sides and bottom of a 9 inch springform pan.  Get out a large roasting pan.

Start a pot of water and get it to boiling for the water bath.

In a large bowl, stir together the graham cracker crumbs and melted butter.  Stir to combine.  Press this mixture into the bottom of the springform pan.  Bake for 8-10 minutes.  Cool.  

Reduce oven temperature to 325 degrees.

Put the sugar and lemon zest into a food processor and pulse until fine.

In your mixer, beat the cream cheese on low speed first, and increasing it to medium until it's light and fluffy.  Slowly add the sugar mixture, stopping to scrape down the sides every so often.  Beat until smooth.

Add sour cream and lemon juice.  Mix until smooth.  Add the eggs, one at a time, until smooth and well-incorporated.

Wrap the outside of the springform pan with heavy duty aluminum foil.  Wrap it well!  If you don't water from the bath will seep in.

Pour the filling onto the baked crust.  Place the springform pan in the roasting pan.  Pour the boiling water in the roasting pan until it comes up halfway.

Bake for 70-80 minutes or until the edges are set but the center is almost set and is still slightly jiggly. Don't over-bake it!  It will firm as it cools.

Remove the roasting pan and let the cheesecake sit in the water bath for 15 minutes while it's on the counter.  Remove from the bath, cool on a wire rack.

Remove the foil, loosely cover the cheesecake, and let it chill overnight.  This is where the magic happens!  Goodness... it is perfect the next day.

Prepare the lemon curd:

In a microwave-safe bowl, add the sugar and eggs and whisk well.  Stir in the lemon juice, lemon zest, and butter.

Cook in microwave, on high power, for 3-4 minutes.  
Cook for one minute, remove and stir.  (2x)
Cook for 30 seconds, remove and stir
Cook for 15 seconds, remove and stir (3x)

That made mine perfect!  Pour into a glass bowl and let it cool.  Serve on top of the cheesecake.

Top that with whipped cream.

Last instruction- try not to eat it all.  I want some!

Sunday, March 1, 2015

Black Magic Cake (The best chocolate cake I've ever tasted!)

Before I talk about the cake, I need to tell a hilarious story.  My family and I are quite nerdy and are into superheroes, Harry Potter, Lord of the Rings, and Star Wars,  One night at dinner, we were discussing if we could be any superhero, who we would be and why.  As a little background, my daughter has a specials teacher (I'll call her Mrs. Jones) at her school who is known for not being too nice.  The thought of going to this special had my poor son in tears on the first day of school for fear of being yelled at by her.  So, when my daughter got to pick her superhero, she said, "I would be Iceman, so I could freeze Mrs. Jones, and put a sign on her that says, "Class dismissed."  I seriously laughed so hard.  That girl cracks me up.  Now to the cake...

The first time I made this cake, I took it to my parent's house for dessert after dinner.  My brother, who happens to love chocolate cake, took a decent sized piece.  He took one bite and said, "This is hands-down the best chocolate cake I've ever had!  How did you make this?!"  Every time we get together for a birthday or if I'm supplying dessert, he quickly makes his way into the kitchen and asks if I made THE chocolate cake.  For my son's birthday recently, he cut himself a piece the size of Vermont and ate the entire thing without hesitation.  I can't say that I blame the guy!  The flavor is complex and delicious, and it stays moist for days!  I don't think I'll ever make another chocolate cake recipe because this one cannot be beat.

One last thing- don't be afraid of the addition of coffee!  I don't drink the stuff, but my husband has Pero on hand, so I use that.  Pero tastes just like coffee but doesn't have the caffeine.  It makes the flavor of the cake outstanding!


Post image for Black Magic Cake…

Hershey's Black Magic Cake
cake source: https://www.hersheys.com/recipes/recipe-details.aspx?id=4754
frosting source: Taste of Home 50th Anniversary Cookbook pg. 230
photo source: http://www.mybakingaddiction.com/black-magic-cake/

Ingredients for Cake:
2 c sugar
1 3/4 c flour
3/4 c cocoa
1 t baking powder
2 t baking soda
1 t salt
2 eggs
1 c buttermilk or sour milk*
1 c strong black coffee (I used Pero)  or 2 t powdered instant coffee plus 1 c boiling water
1/2 c vegetable oil
1 t vanilla

Ingredients for one bowl frosting;
1/2 c butter
2/3 c cocoa
2-3 c powdered sugar
1/3 c milk
1 t vanilla

Heat oven to 350 degrees.  Grease and flour two 9-inch round baking pans OR 1 9x13 pan.

Combine the sugar, flour, cocoa, baking soda, baking powder, and salt in your mixer's bowl.  Use the paddle attachment to combine those ingredients together.  Add the eggs, buttermilk, coffee, oil, and vanilla.  Beat on medium speed for 2 minutes.  (Remember- you've got a whole lot of liquid in there, so your batter will be very thin.)

Pour batter into prepared pans.

For the round pans- Bake 30-35 minutes
For the 9x13- Bake 35-40

Before taking it out for good, do the toothpick test.  Stick a toothpick in the center of the cake, if it comes out clean, the cake is done.

Cool.

For the Frosting:
In a medium, microwave-safe bowl, melt the butter.  Add the cocoa and stir to combine.  Alternately add the powdered sugar and milk. Stir in vanilla.
(I wrote 2-3 c powdered sugar because I tend to use less powdered sugar.  The full three cups makes the frosting too thick for my taste.  I like it a little more like ganache.  Feel free to use the full three cups if you'd like!)

*To make sour milk, put 1 T of lemon juice or vinegar in a 1 c measuring cup.  Add milk to fill to the top.  Let it rest for 5-10 minutes.


Sunday, November 23, 2014

Chocolate Truffle Pie

In case you were so excited by the picture that you didn't read the title of this pie, let me write it out one more time:  Chocolate Truffle Pie.  Hello?!  Talk about three of the most delicious words in our language, and they are all in one dessert.  And let me tell you something else.  People think I am crazy when I say that I don't like pumpkin pie.  Why, you ask?  Because there are desserts like this out there!  Tradition or not, why would I eat a vegetable pureed into a pie when there are desserts like this?  This pie has got to be one of the best pies I have ever eaten.  It was unbelievable!  I don't have step-by-step pictures though.  I think a part of my brother died when we went to my in-laws' house for Thanksgiving because he wanted to try the pie.  I promised him that I would make it again soon, so I'll take pictures next time. 
Sweet & Salty Truffle Pie Recipe


 Chocolate Truffle Pie
recipe and photo source: Taste of Home November 2011 pg 51 or http://www.tasteofhome.com/recipes/sweet---salty-truffle-pie


pie crust (I used a pre-made frozen one and baked it)

Truffles:
2 c dark chocolate chips, divided
1/3 c heavy whipping cream
1 T shortening
2 t coarse sugar
1/2 t coarse salt

Filling:
1 1/3 c semi-sweet chocolate chips, divided
1 1/4 c heavy whipping cream, divided
1/4 c sugar
2 egg yolks
1/4 c butter, softened
2 T vanilla

Topping:
1 c heavy whipping cream
3 T powdered sugar
1/2 t vanilla

Bake the frozen crust according to package directions.  Get a deep-dish one if you can.

For the truffles, melt 1 c dark chocolate in microwave.  Start with 1 minute.  Stir.  Heat in 30 second intervals, stirring after each time, until the chocolate is melted and smooth.  Stir in the cream until incorporated.  Cool to room temperature then refrigerate until firm.  Once the mixture is firm, scoop out about 2 t of the mixture.  Roll into 24 1-inch balls.

Place in the fridge until you're ready to do the next part.  By the way- if making truffles puts this recipe way over the top, you can skip the truffles or plop some store-bought ones on top to save time.

In a bowl, melt the remaining dark chocolate and the shortening.  Stir until smooth. Combine the course sugar and salt.  You can omit this part or use regular suagr and salt, if you'd like.  Stick the truffles on a toothpick and dip them in the metled chocolate mixture.  Let the excess chocolate drip off.  Before the chocolate sets, sprinkle the truffle with the sugar and salt.  Place it on waxed paper to set completly.  Repeat with the remaining truffles.

For the filling, put 1/3 c semi-sweet chocolate in a small bowl.  In a small saucepan, bring 1/4 c of cream just to a boil.  Pour it over the chocolate chips and whisk until smooth.  Once it's smooth, pour it into the bottom of the baked crust.  Place it in the fridge to set- about 15 minutes.

In a small, heavy saucepan, cook and stir the sugar, remaining semi-sweet chocolate chips and remaining cream over medium heat.  Once it is smooth, reduce the heat slightly.  Put the two egg yolks in a small bowl and whisk.  Add a small amount of the chocolate mixture into the eggs.  Stir it together.  Add it back into the chocolate mixture in the saucepan, stirring constantly.  Cook and stir until it reaches 160 degrees- It took me about ten minutes.

Pour this mixture into a large bowl.  Pour in the butter and vanilla.  Stir.  Place this bowl in an ice water bath.  Leave it there, stirring often, until the mixture has cooled.  The cooler it is, the easier it will be to whip it into shape for the next step.  Don't rush this step.  Once it's at room temperature, you could probably even put it into the fridge to speed it up a bit.  Once it is nice and cool, beat it with a mixer until stiff peaks form.

Pour the chocolate mixture into the pie crust.

Just before serving, prepare the topping.  In a bowl, beat the cream until it starts to thicken.  Add the powdered sugar and vanilla.  Beat until stiff peaks form.  Spoon the topping onto the pie.  Top with some truffles.


Oh, how I wish I knew the secret to slicing a pie without making it look like a toddler was digging through it to find a Hot Wheel car. Look past the messiness and try to imagine the taste.  It is out of sight!  I'm not even going to tell you the fat content because I think you will hunt me down and slap me in the face for even tempting you with such an amazing concoction.  On that note, happy pie eating!

Pumpkin Chiffon Pie

I honestly think that my husband has threatened to divorce me over my dislike of pumpkin pie.  It's his absolute favorite, and it has to be made just like it says on the can with his mom's crust recipe.  He could eat it ever day!  When I told him that I was going to try this pumpkin chiffon pie, he was skeptical.  I was a bit nervous since all of my family that came couldn't believe the blasphemous act of not making a traditional pumpkin pie.  Well, I served everyone a piece and just waited for the criticism.  It didn't come.  My husband said that he liked this better than his favorite pumpkin pie.  My brother was inspecting the crust trying to figure out what that deliciousness was.  Everyone loved it, and I think that traditional pumpkin pie is dead to us all!  The texture of this pie is far less dense, and the Nilla wafer crust is to die for.  I'm so glad that I found this recipe because it is a new family must-have for Thanksgiving or whenever my husband craves it.  

Pumpkin Chiffon Pie
source: http://www.thekitchn.com/family-recipe-m-160825

Makes 2 pies

For the crust:
4 c crushed Nilla wafer cookies (a rough texture is fine)
10 T butter, melted
1/2 c sugar
1/4 t salt

For the pie filling:
3 t unflavored gelatin
1/4 c Cointreau (I used water)
1 1/2 c pumpkin puree
1/2 c heavy cream
1/2 c sugar and 1/3 c sugar, divided
3 egg yolks, lightly beaten
3/4 t cinnamon
1/2 t ground ginger
1/4 t nutmeg
1/4 t allspice
1/4 t salt
4 egg whites

fresh whipped cream, to serve

Prepare the crust:

Preheat the oven to 400 degrees.  In a large bowl, combine the cookie crumbs, butter, sugar, and salt.  Stir well to combine.  Press the mixture firmly into two 9-inch pie plates.  There may be some extra.  If you want, you can save it and sprinkle it in top of the whipped cream.

Bake for ten minutes.  Cool.

For the filling:
In a small bowl, sprinkle the unflavored gelatin over 1/4 c Cointreau (or water) to soften for five minutes.  Get a bowl that's bigger, put about a 1/4 c of water in the bowl, and heat it up.  Place the gelatin bowl into this warm water to get it to dissolve.

In a heavy saucepan, whisk together the pumpkin puree, heavy cream, 1/2 c sugar, 3 egg yolks, the cinnamon, ground ginger, nutmeg, allspice, and salt.  Cook over medium-low heat, stirring for 10 minutes.

Transfer the mixture to a bowl.  Stir in the dissolved gelatin, an let the mixture cool.

In a large mixing bowl, beat the egg whites until the hold soft peaks.  Beat in the remaining 1/3 c sugar, 2 T at a time, beating the meringue until it holds stuff peaks, and fold this meringue into the partially cooled pumpkin mixture.

Assemble:
Pour the filling into the baked shells and chill the pie, lightly covered, overnight.

Garnish with plenty of whipped cream and sprinkle with reserved crust crumbles, if desired.


Thursday, October 2, 2014

Caramel Apple Pie

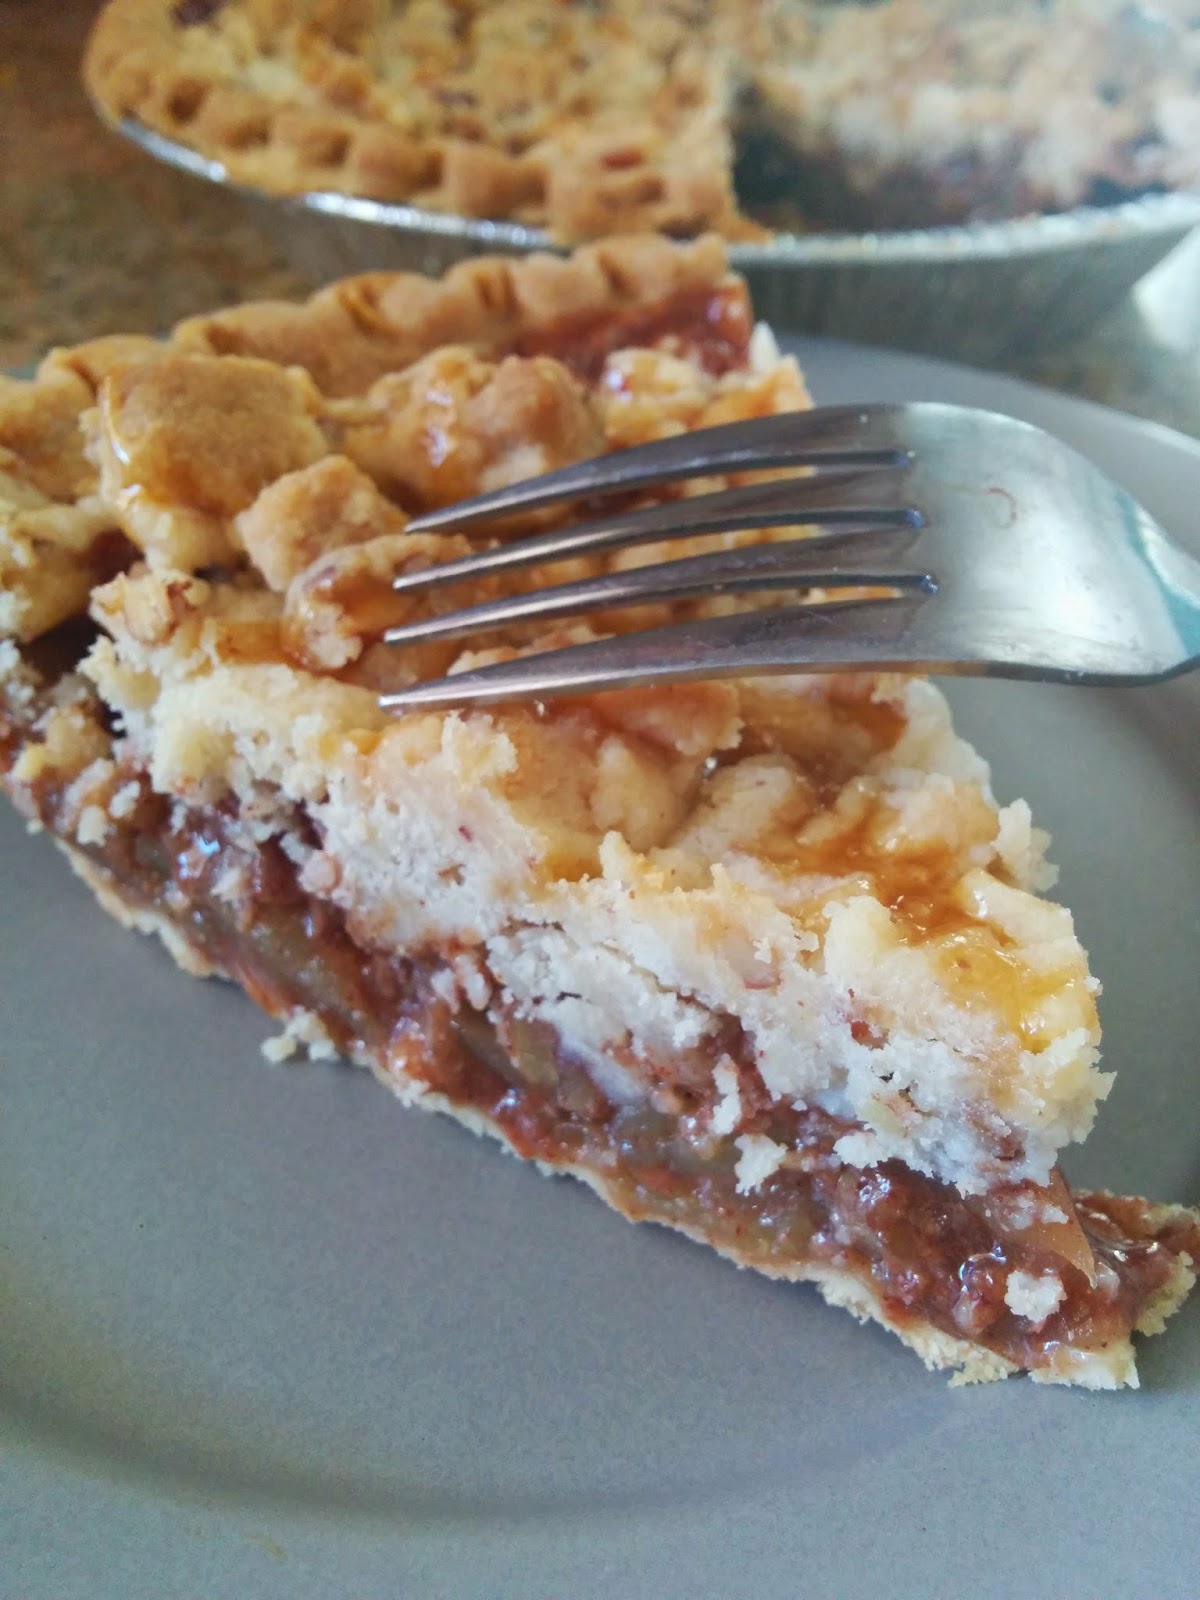
This.  Pie.  Apple pie on its own is over the top delicious and as American as it gets.  Well, take that and add caramel sauce, pecans, and a streusel topping.  Sweet mother of cute little baby animals.
It's a must try.  By using a pre-made shell, it comes together really fast.

Don't forget to serve it warm with a scoop or five of vanilla ice cream!
Caramel Apple Pie
source: http://www.tasteofhome.com/recipes/caramel-pecan-apple-pie

  •  1 teaspoon lemon juice
  •  1 teaspoon vanilla extract
  •  3/4 cup chopped pecans
  •  1/3 cup packed brown sugar
3 tablespoons sugar
  •  4-1/2 teaspoons ground cinnamon
  •  1 tablespoon cornstarch
  •  1/4 cup caramel ice cream topping, room temperature
  •  1 unbaked pastry shell (9 inches)
  •  3 tablespoons butter, melted
  •  STREUSEL TOPPING:
3/4 cup all-purpose flour
  •  2/3 cup chopped pecans
1/4 cup sugar
  •  6 tablespoons cold butter
  •  1/4 cup caramel ice cream topping, room temperature
    *If you're going to make two pies with this recipe instead of one massive one, double the streusel topping.

In a large bowl, combine the sliced apples, lemon juice, and vanilla.  In another bowl, combine the pecans, brown sugar, sugar, cinnamon, and cornstarch, Add this mixture to the apples and toss to coat.  Pour the caramel sauce in the bottom of the unbaked pastry shell.  Top with the apples.  Drizzle with butter. 

As a side note- this recipe is supposed to make just one massive, mound of apple pie deliciousness.  I made it into two pies that weren't as high.  You can see in the pictures that there was still plenty of apples to go around for two shells.  

In another bowl, combine the flour, chopped, pecans, and sugar.  Add in the cold butter.  Using a fork, cut in the butter until it resembles coarse crumbs.  Sprinkle over the top of the pie.

*If you're doing two pies, double the amount of struesel topping and divide it evenly among the pies.  
Bake at 350 for 55-65 minutes or until the filling is bubbling and the top is golden.  Immediately drizzle with caramel topping.

Cool on a wire rack.


Thursday, January 2, 2014

Cookie Dough Bars

Need I say more than "Cookie Dough Bars?"  I keep typing "Cookie Dough Bras."  That could get interesting.  Anyway, with these tasty little morsels, you can indulge in eating cookie dough with the fear of raw eggs.  That never stops me from eating it, but if it terrifies you, this is the recipe for you.  Even better yet, they are no-bake!  
Cookie Dough Bars
source: http://therecipecritic.com/2013/09/chocolate-chip-cookie-dough-bars/

1/2 c butter, softened
3/4 c packed brown sugar
1 t vanilla
2 c flour
1 14 oz. sweetened condensed milk
2 c mini chocolate chips

1/2 c creamy peanut butter
1/2 c milk chocolate chips

Line an 8x8 pan with foil.  Spray with non-stick cooking spray.

In your mixing bowl on medium speed, cream the butter and brown sugar for three minutes until it is fluffy and lighter in color. Add the vanilla and mix well.

Turn your mixer to low, and alternately add the flour and sweetened condensed milk.  Once it's well mixed, add the chocolate chips.

Put the dough in the prepared pan.  It will be sticky, so you might want to spray some nonstick spray on your hands to move it all into place.

Cover with saran wrap and keep in the fridge for 3 hours or overnight.

In a microwave-safe dish, combine the creamy peanut butter and chocolate chips.  Melt in 30 second intervals, stirring after each 30 seconds.  Once the chocolate chips are smooth, pour over the cookie dough.

Chill for one hour or until set.

Sunday, December 8, 2013

Layered Turtle Cheesecake

Thanksgiving is a time of eating lots of vegetables and fruit with dinner.  Mashed potatoes, sweet potatoes, peas, green beans, asparagus, cranberry sauce, vegetable trays, so on and so on.  Well, after getting enough fruit and vegetables during the pre-dinner, and dinner itself, you must be bonkers if you think I'm going to eat any more of that with dessert.  Give me something fattening without a trace of anything healthy.  With that being said, say hello to the layered turtle cheesecake.  "Hello, cheesecake!" This was the second time I've made this cheesecake, and it never disappoints.  My brother is quite the dessert-loving guy, and he said that it was the best cheesecake he's ever eaten, and that is quite the complement coming from him!  I took a slice over to my friend Mindi since she's loves cheesecake almost more than her own children. She put it in a Tupperware container, kept it in a small fridge in her bedroom, and stretched out the life expectancy of that single piece of cheesecake for days as opposed to the minutes that it would last in front of me- hence the thighs.  This cheesecake takes some work, but it is well worth the time and effort.  If you're terrified about the idea of making a cheesecake, buy the ingredients, bring them to me, and I will make it for you.  Yep, it's that good, and I would do that for you.
Layered Turtle Cheesecake Recipe

Layered Turtle Cheesecake

Crust:
1 c flour
1/3 c packed brown sugar
1/4 c finely chopped pecans
6 tablespoons cold butter

Filling:
4 packages (8 oz each) of cream cheese, softened
1 c sugar
1/3 c brown sugar1/4 c plus 1 t flour, divided
2 T heavy cream
1 1/2 t vanilla
4 eggs, lightly beaten
1/2 c milk chocolate chips, melted and cooled
1/4 c caramel ice cream topping
1/3 c chopped pecans

Ganache:
1/2 c milk chocolate chips
1/4 c heavy cream
2 T chopped pecans
additional caramel topping

Preheat the oven to 325.

Place a 9-inch springform pan on two layers of heavy duty aluminum foil.  Wrap tightly around the pan. 

In a bowl, combine the flour, brown sugar, and chopped pecans. Cut in the butter with a fork until the mixture is crumbly.  Press into the bottom of the springform pan.  Bake for 12-15 minutes.  Remove and cool.

In a large mixing bowl, beat the cream cheese and sugars on medium speed until smooth.  Beat in 1/4 c flour, cream, and vanilla.  With the mixer on low, add in the eggs and beat just until blended.  

Remove 1 cup of the batter and place it in a bowl.  Add the 1/2 c melted chocolate chips. Stir to incorporate.  Spread this onto the cooked crust.

In another bowl, combine the 1/4 c caramel topping and 1 teaspoon of flour.  Stir in the 1/3 c chopped pecans.  Drop all of this mixture by spoonfuls onto the chocolate cheesecake layer. 

Pour the remaining cheesecake batter on top.  

Place the foil-wrapped springform pan into a large roasting pan.  Add enough hot water to come up an inch on the springform pan.

Carefully move into the oven and bake for 1 1/4- 1 1/2 hours.  (Mine took the full 1 1/2 hours) The center will be set and the top will look dull.  I also stuck a knife in the middle to make sure that it came out clean.  Remove the pan from the water bath.  Let it cool for 15 minutes on a rack.  Slide a knife around the edge of the cheesecake.  Cool for one hour longer than refrigerate overnight.  

For the ganache, place the 1/2 c chocolate chips in a small bowl.  Bring the cream just to a boil in a saucepan over medium heat.  Once bubbles start to form, take off of the heat and pour over the chocolate chips.  Stir until the chocolate chips are melted and smooth.  Cool slightly.

Remove the sides of the springform pan.  Pour the chocolate ganache over the top.  Garnish with the remaining pecans.  

Drizzle each individual piece with caramel sauce before serving.

*I wish that awesome picture was one that I took, but it's from the Taste of Home website.  We devoured it far too quickly to get a decent picture.  :) 


Sunday, August 25, 2013

S'more Ice Cream

I wish I had a camera that could zoom in without getting blurry.  This ice cream is amazing!  It takes a lot of steps, but I think it is worth every minute!  It's a custard-based toasted marshmallow ice cream with fudge ripple and graham cracker chunks.  It's everything that you love in S'mores all thrown together in ice cream!  It was so rich, so creamy, and dreamy. 

If you don't have an ice cream maker, forego buying new shoes, purses, or clothes for a month and buy a good ice cream maker.  I have a 50.00 Cuisinart one, and it works amazingly!  Homemade ice cream is so much better than store-bought.  In fact, my husband said that the first time he knew he wanted to marry me was when I invited him and some other friends over for homemade ice cream.  It was butter pecan and New York Super Fudge Chunk.  I had him at "ice cream!"  


S'mores Ice Cream
source: http://www.browneyedbaker.com/2012/06/27/smores-ice-cream/

For the Toasted Marshmallow Ice Cream:
1 10 oz. bag of large marshmallows
2 c whole milk
5 egg yolks
1/2 c sugar
pinch of salt
1 c heavy whipping cream
1 t vanilla

For the fudge swirl:
1/2 c sugar
1/2 c water
1/3 c light corn syrup
6 T Dutch process Cocoa (regular would be fine)
1/2 t vanilla

1 1/2 c coarsely chopped graham crackers

Preheat the broiler.  Spread the marshmallows on a cookie sheet on a single layer.  Place under the broiler for about a minute.  Keep an eye on the marshmallows so they don't burn!  Take them out, flip them over with a fork or tongs, and broil the other side for about one minute.

Set aside and let cool.

Place the milk in a medium saucepan.  Bring to a simmer over medium heat.

While that is heating up, put the egg yolks, sugar, and salt in a bowl.  Whisk well.  Once the milk mixture is simmering, slowly pour it over the egg yolks, whisking constantly.  Pour the mixture back into the saucepan.  use a spatula to make sure you get it all back into the pan.  Turn the heat down to medium-low.  Cook, stirring constantly, until the mixture reaches 170-175 degrees or when it thickens and coats the back of a wooden spoon.

Once it is thick enough, put it through a fine mesh strainer in a large bowl.  Let it cool for about 15 minutes stirring every few minutes to help it cool faster.

Put the toasted marshmallows and the cooled custard into a blender.  Blend until smooth.  Add the heavy cream and vanilla and blend for 10-15 seconds.  Pour the mixture in a bowl, cover, and refrigerate overnight.


To make the fudge swirl:
If you don't want to make the fudge swirl, use some jarred hot fudge from the store.  :)

In a saucepan over medium heat, whisk the sugar, water, corn syrup, and cocoa powder.  Whisking constantly, bring to a low boil.  Cook for one minute longer, and continue to whisk.  Remove from the heat, and stir in the vanilla.  Let it cool.  Let it chill in the fridge for at least two hours before adding to the ice cream.

The next day, pour the mixture into your ice cream maker and freeze according to manufacturer's directions.

Once it is made, stir in the chopped graham crackers.  Spoon enough of the ice cream into its storage container to cover the bottom. Plop some fudge onto that layer.  Continue with the layers- Layer of ice cream, dollops of fudge, repeat, until it's all in the storage container.

When you scoop the ice cream, there will be ripples of fudge throughout.  Sweet mercy.  This stuff was tasty!

Friday, July 12, 2013

Toffee Chocolate Bars

These delicious bars have a shortbread-like base, a creamy sweetened condensed milk layer, a chocolate layer, and a toffee layer.  Do I really need to go on any more about these?  They were wonderful!  My husband took them around to some people, and everyone loved them.  They're tasty little morsels!
Toffee Chocolate Bars
source: pinterest- The original source wasn't listed- sorry!

Base:
3/4 c butter
3/4 c brown sugar
1 1/2 c flour

Preheat oven to 350.

Cream these ingredients in a mixer and press into a 9x13 pan.

Bake for 20-25 minutes.  Take out and cool.

Filling:
10 oz. can sweetened condensed milk
2 T butter

Heat in a small saucepan over medium heat.  Once the butter is melted (5-10 minutes), pour it over the base.
Bake in the 350 degree oven for 12-15 minutes.

Topping:
1 3/4 c chocolate chips
1 1/3 c toffee pieces

Sprinkle on chocolate chips.  Bake for two minutes longer.  Remove from the oven and spread with a spatula to smooth them out.  Once they are nice and smooth, sprinkle the toffee pieces on top.  Lightly press them into the chocolate so they stick.

Cool.  Cut into squares.