Showing posts with label side dish. Show all posts

Sunday, January 3, 2016

Outback Green Beans Copycat

Let me tell you a little fairy tale.

There once was a guy (I'm not saying any names to protect those involved) that hated green vegetables.  I mean, he looked at them as though the were dirt clods.  It's quite safe to say that he was completely disgusted by the things.  Now, this guy was a good sport, and he would give them a try when someone put them on the table just to be nice.  However, after one bite, they sat on his plate and went cold.  Smothered in cheese?  No, thank you.  Drenched in garlic butter?  Meh. I'll pass.

Well, these French green beans were presented to him.  Disgruntled, he agreed to try them.  He took a bite, and all sitting at the table waited in eager anticipation but expected a snarl on the face.  He said, "MMM!  What did you put on these things?!  I love these!  Like,  I don't even want to eat anything else on my plate even though it all looks amazing."  He scarfed down the green beans and demanded that the recipe never be lost.  Hence, here I am documenting the recipe for this chap that has come to love a green vegetable.  *Enter a heavenly light from above with angels singing a chorus of wonder and praise.*

These really were delicious.  I've never had the Outback version of these, but if they are anywhere near this good, I'm impressed!


Outback Green Beans Copycat
source: http://www.copykat.com/2011/10/09/outback-steakhouse-steamed-green-beans/

Ingredients:
1 pound fresh green beans, trimmed on the ends
4 T butter
1 T brown sugar
1/2 t soy sauce
1/2 t garlic powder
1/8 t salt
1/8 t cracked black pepper

Steam the green beans for 8-10 minutes or until tender.

Meanwhile, add the remaining ingredients in a small saucepan over medium heat.  Cook and stir until the butter is melted and the sugar is dissolved.

Place the green beans on a plate, drizzle the butter mixture over them, and toss to combine.

That's it!  Enjoy!
Friday, May 22, 2015

Bistro Mac'N'Cheese

This recipe doesn't have bacon, but this made me laugh pretty hard.  My youngest daughter requested breakfast for dinner tonight, so I was frying up some bacon.  My 7 year old son wanders up, looks in the pan, and says, "Mom, I love to watch the bacon dance."

"The bacon dance, hih?  What exactly does that look like?"

He plops down on the ground face-first with his arms to the side and starts shaking and twitching like a worm trying to escape rain.

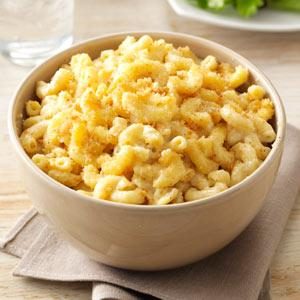
There you have it folks... the bacon dance.  It's a thing.  Bacon would be an excellent addition to this tasty dish, although I didn't add any in.  This stuff is pure gold on its own.  My husband took a bite and told me that he was having a love affair with it.  I've been demoted.  The Gargonzola has a very strong flavor, so if you don't like the taste of it, leave it out!  You can just add more mozzarella or cheddar.  More cheese, please!

Enjoy this quick, tasty dish.  I've made it three times already since I first  found the recipe, and that it saying something!  You'll love it!

Bistro Mac & Cheese Recipe
Bistro Mac'n'cheese
Recipe and photo source: http://www.tasteofhome.com/recipes/bistro-mac---cheese

8 servings
Time: 25 minutes

Ingredients:
16 oz. elbow macaroni
5 T butter, divided
3 T flour
2 1/2 c milk
1 t salt
1/2 t onion powder
1/2 t pepper
1/4 t garlic powder
1 c mozzarella cheese
1/2 c crumbled Gargonzola (omit if you don't like the flavor of this cheese)
3 oz. cream cheese
1/2 c sour cream
1/2 c seasoned bread crumbs

Cook the elbow macaroni according to the directions on the package.  Drain and set aside.

In a large saucepan, melt 3 T butter over low heat.  Stir in flour until it's smooth.  Slowly whisk in the milk and seasonings.  Bring this to a boil.  You may need to increase the heat to medium but no higher.  Once boiling, cook and stir for two minutes or until thickened.

Turn heat to low.  Add the mozzarella, Gargonzola, and cream cheese.  Stir until melted.  Stir in the sour cream.  Add the drained pasta and toss to coat.

Optional:

In a small pan, melt remaining 2 T of butter over medium heat.  Add the breadcrumbs, cook, and stir until golden brown.  Take off of heat.

Pour the macaroni and cheese into a serving dish and sprinkle with breadcrumbs.

Sunday, November 23, 2014

Sweet Potato Casserole


Me: I would take this sweet potato casserole over pumpkin pie any day of week!
My brother, with a lip smack and dirty look: You kiss your mother with that mouth!?  How dare you?!

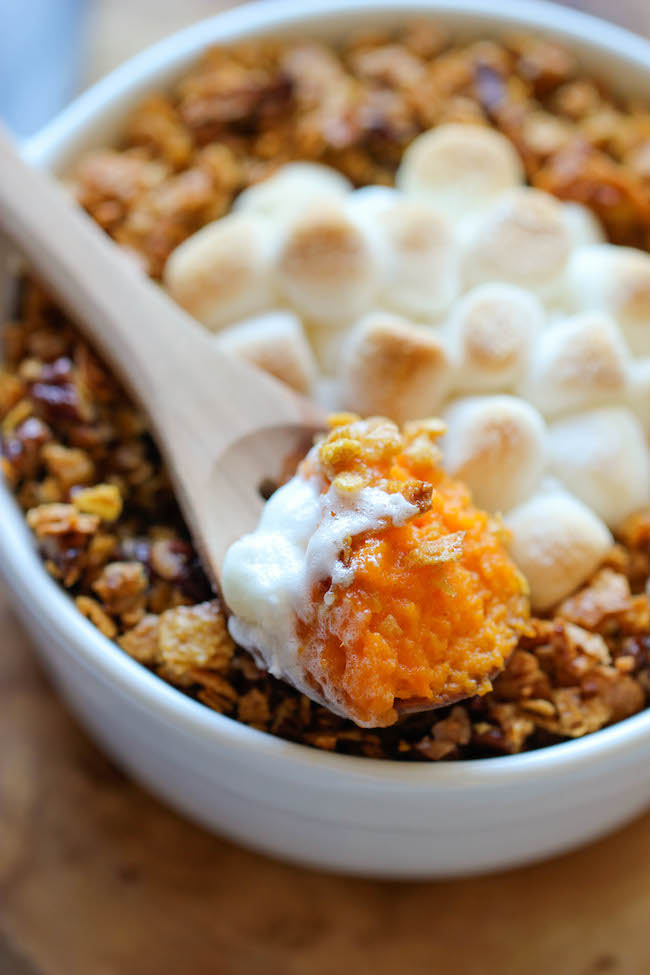
Seriously though, I would!  This was, by far, my favorite dish on the Thanksgiving table.  The mashed sweet potatoes, the crunchy pecan-Corn Flake topping, and roasted marshmallows blew my mind!  Why did I not eat this stuff as a kid?!  I find no need to hunt for a different sweet potato recipe for Thanksgiving.  This is the best one I've ever tasted.  Thanks blogger at damndelicious.net.  These sweet potatoes, were, indeed, that.  

Sweet Potato Casserole - Made with mashed roasted sweet potatoes and a crunchy pecan topping with an ooey gooey melted marshmallow center!
Sweet Potato Casserole
photo and recipe source: http://damndelicious.net/2013/11/20/sweet-potato-casserole/

serves 6

3 pounds sweet potatoes
1/4 c unsalted butter, at room temperature
1/4 c sugar
1/4 c milk
1 large egg
1/2 t vanilla extract
1/4 t salt

For the topping:
1 1/4 c cornflakes, crushed
1/3 c pecans, chopped
1 T brown sugar
1 T unsalted butter, melted
1 c mini marshmallows

Preheat over to 400 degrees.  Bake sweet potatoes for 1 hour, or until tender.  Let cool before peeling.

Reduce temperature to 350 degrees.  Lightly grease a 9 inch pie plate.

Make the topping.  Combine cornflakes, pecans, and brown sugar.  Stir in butter until well-combined; set aside.

In your mixer bowl, use the paddle attachment to beat the sweet potatoes, butter, sugar, milk, eggs, vanilla, and salt on medium-high heat until well-combined, about 1-2 minutes.

Pour the mixture into your prepared dish.  Sprinkle the cornflake mixture around the edges, leaving the center open.

Bake for twenty minutes.  Remove from oven and add the marshmallows in the center.  Bake an additional 5 minutes or until the marshmallows are golden.

Serve immediately.


Fresh Cranberry Chutney

There is a girl that blogs recipes at melskitchencafe.com, and I take her word like gospel.  Every recipe of hers that I have tried is amazing.  In fact, if Mel and Martha Stewart were standing in front of me trying to offer cooking advice, I'd tell Martha to take a hike!  Get your orange jumpsuit, Martha!  You're dead to me! 

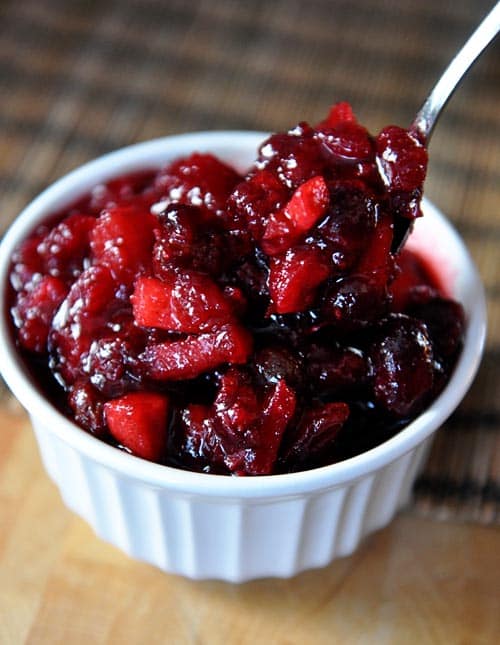
I was hunting for a cranberry sauce last year, and it was my first time ever making it!  Of course I went to melskitchencafe.com by default, and I found this gem of a recipe.  It has raisins, apples, celery, and onion in it which is a little different, but sweet mercy it is delicious!  My dad walked in and saw me carrying cranberries.  I didn't get a "Hello! How are you?"  I got, "Is that regular cranberries or cranberry chutney?"  I don't even think he smiled at me!  He is serious about his love for this cranberry chutney!  I see no reason to ever make another type of cranberries, and for the love of all that is holy, do not use the canned stuff!!  
Fresh Cranberry Chutney

Fresh Cranberry Chutney

makes about 4 cups

4 c fresh cranberries
1 c dried raisins or craisins
1/2 c white sugar
3/4 c packed brown sugar
2 t cinnamon
1/2 t ginger
1/4 t cloves
1 c water
1/2 finely minced onion
1/2 c chopped granny Smith apple, peeled an cored
1/2 finely chopped celery

In a medium saucepan, combine the first eight ingredients.  Bring to a boil over medium-high heat.  Once it starts boiling, reduce the heat to medium-low and simmer until the berries start to pop, about 5-7 minutes.

Add the onion, apple, and celery.  Continue to cook, stirring occasionally, until it starts to thicken, 5-10 more minutes.  

Transfer to a container, cool slightly, an refrigerate overnight.

Classic Thanksgiving Stuffing

One quick anecdote...  We were sitting around eating the dinner the other night and as soon as there was a lull in the conversation (that doesn't happen often with two daughters), my first grade son said, "My favorite compound word is buttcheek."  Generally, I wouldn't go for that kind of language at the dinner table, but we were all laughing so hard, I couldn't get mad at him.  You never know what those kids are going to say!

Oh, stuffing.  I wouldn't go near the stuff when I was a kid, but I love it now!  The first time I made this stuffing, my dad protested because it was not my mom's classic stuffing that she's been making since the dawn of time.  His attitude quickly changed when he took his first bite!  This stuffing is great.  It's just your classic stuffing- no cornbread, sausage, craisins, roasted duck, or whatever else folks put in stuffing. That's all fine and dandy, but this recipe is a keeper, and it'll complete any Thanksgiving table.  The eggs may throw you for a loop, but don't leave them out!  When you bake it, the eggs will give the top a nice crunch.  Because honestly... who wants soggy stuffing?  Not me! 

Classic Stuffing by America's Test Kitchen

12 servings

12 T butter
4 celery ribs, chopped fine
2 onions, minced
1/2 c fresh parsley, minced
2 t dried sage
1 t dried thyme
1 t marjoram
3 lbs. white bread, cut into 1/2 inch cubes and dried
4 c low sodium chicken broth
4 large eggs, lightly beaten
2 t salt
2 t pepper

Melt the butter in a 12-inch skillet over medium-high heat.  Add the celery and onions.  Cook for ten minutes until the onions are softened- about ten minutes.  Stir in the fresh and dried herbs, stir, an cook for one minute longer.

Transfer to a very large bowl.  Add the dried bread, broth (I only used about 3 cups), eggs, salt, and pepper to the onion mixture.  Toss to combine.  Just to warn you- if your bowl isn't big enough, you're going to have bread chunks, onions, and celery flying all over the place.

Put the mixture into a 10x15 inch baking dish.  Cover with foil and bake for 25 minutes in a 350 degree oven.  Remove the foil and continue to bake for 30 minutes longer.  

Cool for ten minutes.


Friday, September 26, 2014

Grilled Zucchini with Parmesan

My husband, who has been deemed as "his worshipfulness" in the past for his particularly picky palate, who also can't stand the thought of zucchini, went back for seconds of this zucchini!  Thump!!  That was me falling out of my chair.  I couldn't believe it.  This is a really quick and really easy way to prepare zucchini.  It's great because with only a couple minutes per side, the zucchini doesn't get overcooked and mushy.  The lemon and Parmesan give it a great flavor.  Besides, everyone knows that sprinkling Parmesan on anything makes it a billion times better.  


Grilled Zucchini with Parmesan

2 zucchini, medium sized
2 T olive oil
1/2 t kosher salt
1/2 t pepper
1 whole lemon, zested
Parmesan cheese

Slice the ends of the zucchini off.  Cut them into quarters, lengthwise.  Place them in a Ziplock bag.  Add the olive oil, salt, pepper, lemon zest, and the juice of 1 lemon.  Seal the bag and swish it all around to evenly coat the zucchini.

Let it marinate for 15-20 minutes in the fridge.

Preheat the grill to medium to medium-low heat.  

Place the zucchini on the grates and grill each side for 2-3 minutes- being careful not to burn them.

Top with Parmesan cheese.

Sunday, December 8, 2013

Crock Pot Creamed Corn

So, I took a completely unannounced hiatus from blogging.  Work is insanely busy this year, my adorable little one year old acts like she a mind of her own and can do more damage than a level 5 hurricane, and at the end of the day, the thought of looking at a computer one second longer made me a little queasy.  Well, lo and behold, here I am again.  Hopefully to post more than once every four months.  :)

This is a tasty little side dish that can be whipped up in about five minutes, and it is a delight!  Creamed corn frightened me for many years.  I wouldn't touch the stuff.  I was a bit of a vegetable purist, and I didn't think anything but butter belonged on them.  I'm come around, and boy, do I love this stuff.  This recipe is so easy, and the whole family scarfed it down.    
Slow Cooker Creamed Corn
Source: http://damndelicious.net/2013/11/24/slow-cooker-creamed-corn/
serves: 8-10

3 15 oz. cans corn, drained
1 c milk
1 T sugar
1/4 t pepper
8 oz. cream cheese, cubed
1/2 c butter (1 stick), cubed

Brace yourself for the easiness...

In the slow cooker, combine the drained corn, milk, sugar, and pepper.  Stir well.

Put the cubed cream cheese and butter on the top.  Put the lid on the slow cooker and set to low.  Cook for 2-3 hours.  Uncover and stir well.
Set the slow cooker to high and heat for 15 minutes.

Serve.

Sunday, August 25, 2013

Pasta with tomatoes, Basil, and Parmesan

While I was hunting for a side dish for some chicken, I stumbled upon this simple recipe.  It is so easy, so fresh, and so tasty.  The fresh tomatoes and herbs are fantastic!  My husband and I loved it.  That is all.  :)


Pasta with Tomatoes, Basil, and Parmesan
source: marthastewart.com

1 lb plum tomatoes
1/4 c fresh basil leaves
1 T fresh parsley
1 T chopped garlic
1/4 c olive oil
course salt and ground pepper
1 lb spaghetti
grated Parmesan

Finely chop the tomatoes, basil, and parsley.  Add the garlic and oil.  Stir to combine.

Boil water and add the spaghetti.  Cook to al dente, according to the package directions.  Drain the pasta.

Toss the pasta with the tomato mixture.  Drizzle with a little more olive oil and top with parmesan cheese.

Monday, June 3, 2013

Parmesan Pasta Primavera

This recipe originally called for a Romano cheese and Greek yogurt sauce with the noodles, which I'm sure would have been delicious.  However, when I opened my Greek yogurt that had been hiding in the back of the fridge and was one day past expiration, it looked like someone had sprinkled the cremated remains of a Smurf all the over the top of the yogurt.  Have you ever seen blue mold?  Besides in Bleu cheese?  Maybe it is common, but I kind freaked out thinking that Papa Smurf was no longer with us and now atop my expired Greek yogurt.  This new sauce I found was quick, easy, and delicious.  I was worried about the flour and milk because sometimes sauces with that base turn out floury and milky.  Ick.  I was pleasantly surprised.  The vegetables were cooked to perfection, and this was a fantastic side dish. 
 Parmesan Pasta Primavera
serves 6-8
source for Vegetables: http://www.askchefdennis.com/2011/02/my-post-for-chobani-yogurt-and-ask-chef-dennis/
source for Parmesan Sauce: food.com/recipe/parmesan-sauce-59992

1 lb. angel hair pasta
1 T olive oil
1 zucchini, cut into spears or semi-circles
1 yellow squash, cut into bite-sized pieces
1 small head of broccoli (or 1 c frozen broccoli)
1 c sliced mushrooms
1 red pepper, cut into strips
1 c snap pea pods
2 carrots, sliced (I was out of carrots)
2 cloves garlic, minced
salt and pepper

1/3 c flour
3 c milk
1/4 t ground nutmeg
3/4 c Parmesan
1 t butter

Get your vegetables ready.

Start boiling your water for the pasta.

Heat a large skillet over medium heat.  Add 1 T of olive oil.  Once it is hot, add your vegetables and saute them.  I added the mushrooms in only a few minutes before I was ready to serve the dish so they weren't too soggy. After sauteing them for a few minutes, reduce the heat to low while your pasta cooks.  You don't want the vegetables overcooked.

Cook the pasta.

In a saucepan, whisk the flour to remove lumps.  Add just 1 c of milk and whisk to combine.  Add the remaining milk and nutmeg.

Whisk over medium heat until thickened abd comes to a boil.  It should take about 4-5 minutes.  Remove from the heat and add in the Parmesan cheese and butter.  Season with salt and pepper.

Drain the pasta.  Put it in a serving dish and add the sauce until you have how much sauce you like on the noodles.  Top with the vegetables.  Sprinkle with a little more Parmesan cheese, if desired.
I'm not sure why that yellow squash in the middle looks like a flashlight hidden like E.T amongst a pile of vegetables.  Oh, well.  This was delicious.

Thursday, May 30, 2013

Mexican Street Corn

My son was building a city out of Legos the other day.  Being a child of the 80's, I asked him, "Did you build that city on rock'n'roll?"  After he glared at me with a perplexed look, he asked, "What does that mean?"  I turned to good ol' Youtube and pulled up the Jefferson Starship video for "We built this City."  It was hard for him to listen to the music because he couldn't get past the fact that the girls had crazy, feathery, mullet-ish boy haircuts, and the boys had on more make-up than the girls.  In the background of the video, they were showing some scenes from Las Vegas.  I saw one hotel that has since been imploded, and I mentioned that to him.  He asked, "What does imploded mean?"  I quickly turned off the 80's cheesiness that is Jefferson Starship and googled implosion videos.  The next seventeen minutes was spent watching a compilation of 2012's best implosions.  His eyes were glued to the computer.  After the seventeen minutes was over, he went back over to his city.  I don't think that he gave rock'n'roll a second thought because he was trying to figure out how he could blow-up his city.  You've gotta love boys.

I'd like to see an implosion up-close, and when I do, I'm going to make this corn to gnaw on while I watch it.  This corn was so tasty!  The lime zest and juice was a nice touch.  My husband, who generally only prefers corn when it is popped and smothered in butter and salt, ate three pieces of this corn.  He said that it was the best corn he'd ever eaten.  I might have to agree.  It was incredible, and it is a good side dish for any Mexican feast you're having.  Ole'!  

Mexican Street Corn
source: Better Homes and Gardens Special Interest Publications Mexican edition

6 large ears of corn, husked and silks removed
1/2 c snipped fresh cliantro
1 T ancho chile powder
2 t lime zest
1/4 to 1/2 t cayenne pepper
1/4 c melted butter
2 T mayonnaise
2 T sour cream
2 T lime juice
cotija cheese

Boil your ears of corn according to package directions.  Once it is cooked, turn off the heat and let it sit in the water while you prepare the rest.

In a small bowl , stir together the cilantro, ancho chile powder, lime zest, and cayenne pepper.  Set aside.

In another bowl, mix the melted butter, mayonnaise, sour cream, and lime juice.

Remove the corn from the water, drain.

Brush the butter-mayonnaise mixture onto the cooked corn.  Sprinkle the cilantro mix onto the corn.  Place on a serving platter and garnish with Cotija cheese.

Thursday, April 25, 2013

Twice Baked Sweet Potatoes with Brown Sugar Streusel

Here is a little glimpse into the mind of my childhood:
Any kind of bean: Uhh, that looks like a cockroach.  I'm not eating that.
Onions: Uhh, that makes people cry when it's cut open.  What a bully.  I'm not eating that.
Tomatoes: Uhh... I'm not sure if it's a vegetable or a fruit.  I'm not eating that.
Mexican food: Uhh.. there is nothing in the world better than chicken fingers.  Just because we're at a Mexican restaurant, it doesn't mean I have to get Mexican food, anyway.  Could you make those chicken fingers medium and bring two extra sides of ranch?
Sweet potatoes: Those potatoes look like they got a bad spray tan.  I'll pass.

Seriously though.  I was the pickiest kid.  I'm afraid I've passed it onto my kids.  I would never eat sweet potatoes.  Not even when they were smothered in marshmallows at Thanksgiving.  I think that has to do with the fact that my mom makes the most magical mashed potatoes in the world.  Yes, folks, in the whole, wide, entire, world.  No other potato could ever find a place in my heart at Thanksgiving when those delectable, fluffy potatoes graced my presence.  I'm so glad that I've come around to liking sweet potatoes now that I have entered my fourth decade.  These twice baked sweet potatoes were amazing.  I just couldn't get enough of them.  This recipe is a keeper for sure.  
Twice Baked Sweet Potatoes with Brown Sugar Streusel
source: http://www.laurenslatest.com/twice-baked-sweet-potatoes-with-walnut-streusel/

3 large sweet potatoes
4 T packed brown sugar
3 T butter
pinch salt
1/2 t cinnamon

Streusel:
3 T flour
1/4 t cinnamon
1/4 c chopped walnuts
2 T butter
3 T packed brown sugar

Stab the potatoes a couple times with a fork or knife.  Bake at 350 for 30 minutes or cook them in the microwave for 13-15 minutes.

After they're cooked, slice them in half.  Scoop out the insides into a bowl.  Make sure to leave a thin layer of sweet potato on the skin.  Add the brown sugar, butter, salt, and cinnamon to the sweet potatoes in the bowl.  Mix until smooth.  Spoon the filling into the shells.  You'll have 1-2 shells left-over.  Just toss the extras.

In another bowl, combine all the streusel ingredients.  Mix with a fork until it starts to resemble coarse crumbs.  Sprinkle this mixture onto the sweet potatoes.

Bake for 20-30 minutes
at 350.

Friday, February 22, 2013

Stacked Baked Potato Slices

These little stacks were a huge hit with the family.  They were a great but different way to serve up potatoes. I loved them! 
Stacked Baked Potato Slices
source: I can't remember! Ahh!

2 baking potatoes
3 T olive oil
1 T minced garlic
1 t parsley
salt and pepper
sour cream
chopped green onions or chives

Preheat the oven to 425.

Fill a large saucepan about 2/3 full with water.  Add a touch of salt and set heat to high.

Wash and scrub your potatoes.  Slice the potatoes in 1/8-1/4 inch slices.  You want them pretty thin.  A mandolin slicer would work best.  Once the water is bowling, add the potato slices and boil for only 3 minutes.  Remove them gently and place on a paper towel-lined plate.

Place the potatoes in a large bowl and add the minced garlic, olive oil, parsley, and salt and pepper to taste.  Gently toss with a wooden spoon.

Spray ramekins or a muffin tin with cooking spray.  Add about 6 slices in each cup.

Bake for 15 minutes.

Remove with a fork.  Top with a bit of sour cream and minced chives or green onions.

Monday, February 4, 2013

Cheesy Bacon Potato Slices with Chipotle Ranch

I love that I saw these potato slices on a list of recipes that are an alternative to those unhealthy fried French Fries.  Yes, these potatoes are baked.  However, they are also covered in cheese and bacon.  So, let it be said here that while these are not fried, they aren't exactly Weight Watcher friendly either, which is why I love them.  :)  

Cheesy Bacon Potato Slices
source: http://vittlesandbits.blogspot.com/2012/02/cheesy-bacon-oven-chips-with-chipotle.html

serves 2-3

1 large Russet potato
3/4 c shredded cheese, cheddar, Monterey Jack, or Pepper Jack
4 strips bacon, cooked and crumbled
chopped parsley or green onions, optional

Chipotle Ranch
1 T ranch
3 T sour cream
1/4 t chipotle chili powder
1/8 t cayenne powder
1/8 t salt
1/8 t garlic powder

Preheat the oven to 375.

Slice the potato into 1/8 inch rounds.  Try to keep them as evenly sliced as possible.  Boil the potato slices for five minutes.  Drain well.

Spray a cookie sheet with cooking spray.  Layer the potato slices on it, so they are overlapping slightly.  Sprinkle with salt and pepper.  Sprinkle the cheese on top.  Sprinkle the bacon on top.

Bake for 12-14 minutes.

Combine all the Chipotle Ranch ingredients in a bowl and stir to combine.

When the potatoes are finished, take them out, and top with fresh parsley or chopped green onions.  Serve with the Chipotle Ranch.

Tuesday, January 15, 2013

Cuban Style Black Beans

See the beans in the background?  Yeah, those are the ones.  Sorry I didn't get a closer picture.  My husband, who lived in Guatemala for two years and ate black beans every day tasted them and said, "I think you have just trumped my black beans.  These are amazing."  Indeed they are, my friends.  And, get this.  This recipe is actually healthy!  Can you believe that I have actually posted something that doesn't contain a pound of cheese, 3 c of heavy whipping cream, or 8 types of chocolate?  It is possible.  Since the beans are healthy, I did include the picture of the cheese enchiladas that contained the pound of cheese.  See?  The break from blogging did not make me a softy.  

If you like these types of beans, like the ones they serve at Cafe Rio or other Mexican restaurants, you'll love this recipe.  I don't reckon I will ever make another bean recipe again.  There's no need to!


Cuban Style Black Beans
source: http://www.skinnytaste.com/2011/01/quick-and-deliciouso-cuban-style-black.html

2 t olive oil
1/2 onion
2 cloves garlic
2 scallions
2 T red bell pepper
3 T cilantro
15 oz can black beans, do not drain
1/4-1/2 c water
1 bay leaf
1/2 t cumin
1/4 t oregano
1 t red wine vinegar
salt and pepper to taste

In a chopped or food processor, combine the onion, garlic, scallions, red bell pepper, and cilantro.  Pulse until the are all chopped into small pieces.

Heat the oil in a skillet over medium-high heat.  Add the chopped vegetables and saute until tender, about 3 minutes.

Add the beans and the remaining ingredients.  Bring it back to a boil.  Stir.  Turn down heat and simmer for 15 minutes.  Add more water and/or salt, if needed.


Best Mexican Rice Ever

No joke... This is the best Mexican rice I have ever tasted.  There are quite a few steps involved, but I think they are worth every last one of them.  I would take 15 minutes more work with this result over a convenient boxed mix any day!  The first time I made this, my husband was inspecting the rice.  I was waiting for him to bust out his magnifying glass and ask Watson to solve the mystery of the delicious rice.  Finally he asked, "How did you do this?!"  Well, I keep a little Mexican woman named Maria under the kitchen sink.  Not really, but it tastes authentic and I'm sure if there was a Mexican woman named Maria that lived in my kitchen, I just might beat her at a Mexican rice throwdown!  Bring it on!  I've got my sombrero ready.  

Mexican Rice
source: food.com

1 can diced tomatoes
1 medium white onion
3 medium jalapenos (I only used 1 in the hopes that my kids would eat it)
2 c long grain white rice (not instant!), uncooked
1/3 c canola oil
4 minced garlic cloves
2 c chicken broth
1 T tomato paste
1 1/2 t salt
1/2 c fresh cilantro
1 lime

Preheat oven to 350.

Place diced tomatoes and onions in a blender or food processor.  Process until smooth. Transfer to a measuring cup to get 2 c of the mixture.  Discard the rest.

Remove the seeds and veins from 3 jalapenos  If you want less heat, use one.

Place rice in a fine mesh strainer and run under water until the water runs clear- about 1-2 minutes.  Don't skip this step! This removes the starch from the rice and it cooks up better.

Heat oil in an oven safe dutch oven pan over medium-high heat.  (If you don't have one, use any skillet and later transfer the mixture to an oven-safe dish.)  Make sure the oil is hot enough by dropping in a couple grains of rice.  If it sizzles, it's ready.  Add the rice and fry it for 6-8 minutes.

Reduce heat to medium.  Add in 2 diced jalapenos and garlic.  Cook for another 1-2 minutes, stirring constantly.

Add the broth, pureed mixture, tomato paste, and salt. Bring back to a boil.  Place the lid on the oven-safe dish and place it in the oven.  If you don't have an oven-safe dutch oven, transfer the rice to an oven-safe dish and cover it with foil.

Bake for 30-35 minutes, stirring after 15 minutes.

Take it out.  Add the chopped cilantro and the remaining diced jalapeno.  Stir.

Garnish with lime wedges.

Monday, September 24, 2012

Baked Four Cheese Penne Pasta

When my husband asked what the four cheeses were for this dish, I said, "sharp cheddar, mas-car-pony, er, mascapon, uh, marscapone.  You know that one that starts with an m.  And gruyear, uh, guyerre, er, gorilla, or something like that.  And fonti.... here is the recipe.  I can't pronounce these crazy cheeses, but I'm sure it'll be delicious!"  And, it was.  Despite the fact that I could have bought two filet mignon steaks for the same price as these four cheese, I loved it!  The flavor of the cheese sauce was incredible.  I loved the crunchy Panko topping, and the melty, gooey, goodness all over the pasta.  I can't make this too often since the cheese will cost you your first born, but it is amazing.


Baked Four Cheese Penne Pasta

1 pound penne (or whatever pasta you like)
1 shallot, minced (I used an 1/4 of an onion)
2 garlic cloves, minced
5 T butter
1/4 c flour
2 c milk
1/3 c mascarpone cheese
8 oz. freshly grated Gruyere cheese
8 oz. freshly grated sharp cheddar cheese
8 oz. freshly grated fontina cheese
1/4 t salt
1/2 t pepper
1/4 t nutmeg
1/3 c Panko breadcrumbs

Preheat the oven to 375 degrees.  

Grate the cheese into a bowl and set aside.  Prepare a pot of water to boil the pasta according to package directions, stopping 3-4 minutes before 'al dente.' Drain 

Heat a skillet to medium-high heat with the butter.  Once hot, add the shallot (or onion). Saute the onion for a couple minutes.  Add the garlic and saute another minute.  

Add flour and whisk for a couple minutes to create a thick paste.  Add the milk a little at a time and whisk to combine.  Cook for a couple minute until it thickens.  Add in the mascarpone and all but 1/2 c of the grated cheeses.  Stir for 3-4 minutes until the cheese melts.  Season with salt, pepper, and nutmeg.  

Add the drained pasta to the sauce.  Pour into a oven-safe dish.  Top with the remaining cheese and panko breadcrumbs.  You could use regular bread crumbs, but Panko is so much better!

Bake for 30-35 minutes. It should be slightly browned on top and bubbly.

Saturday, September 15, 2012

Parmesan Roasted Red Potatoes

 Parmesan Roasted Potatoes
source: thehungryhousewife.com

1 pound red potatoes, washed and cubed
olive oil
1/3 c Italian seasoned bread crumbs
2 T grated Parmesan cheese
1/4 t onion powder
1/2 t garlic powder
salt and pepper

Preheat the oven to 450.

Line a baking sheet with aluminum foil for a quick clean-up.

Dice the potatoes in about 1 1/2 inch cubes.
 In a small bowl, combine the bread crumbs, Parmesan cheese, onion powder, garlic powder, salt, and pepper.
 Place the potatoes in a large bowl.  Drizzle enough olive oil over the potatoes to coat them.  I probably used about 1/4 cup.  Shake the bowl to evenly coat the potatoes.
 Dump the crumb-Parmesan mixture over the potatoes. Shake or stir to coat.

 Pour onto the prepared baking sheet.
 Lovely.
 Bake for 30 minutes, removing to stir every ten minutes.  This picture below was after the first ten minutes.
 Voila!  After the full thirty minutes, you have beautifully golden Parmesan-crusted potatoes.

Sunday, January 8, 2012

Grilled Vegetable and Mozzarella Salad

As I was making dinner tonight, I was hoping to find some sort of grilled vegetable side dish.  I stumbled upon this recipe, and by same crazy miracle, I had everything on hand.  Very rarely do I have tomato, yellow pepper, and zucchini on hand.  This is not a recipe that I would have touched during my All-I-eat-is-chicken-fingers youth stage.  Heck- I wouldn't have gone near this even a few years ago.  Luckily, my taste buds have finally matured now that I'm 30.  Now if only my sense of humor would mature a bit.  :)

 I was pleasantly surprised by the variety of flavors and textures in this salad.  It's definitely not a traditional salad by any means, but I think it's a great addition to a grilled meal.  I wouldn't try to make your little ones eat this.  They may look at you, scoff, and claim that they would sooner listen to a documentary about the Harrison presidency- while eating dates and prunes.  Talk about torture!  Grown-ups with refined tastes would be all over this tasty side dish.
Grilled Vegetable and Mozzarella Salad
source: Grill It! A Better Homes and Gardens cookbook (A good one, if you're wondering)
serves: 4

2 medium tomatoes, halved
1 zucchini, halved lengthwise
1/2 yellow pepper, seeded and quartered (a red or orange pepper would be fine to use)
romaine lettuce
2 oz mozzarella, cubed
Italian dressing (optional)

vinaigrette:
1 T cider vinegar
1 T balsamic vinegar
1 1/2 T olive oil
1/2 T brown sugar
1/4 t salt
1/4 t black pepper

Combine all of the vinaigrette ingredients.  Pour into a Ziplock bag.

Once all of your vegetables and cut according to the ingredient list, place them in the Ziplock bag with the dressing.  Seal the bag and shake to coat.  Let the vegetables marinate for 30 minutes at room temperature.

Also, if you'd like, you can let the mozzarella cubes marinate in Italian dressing while the vegetables are resting and grilling.  This is something I added to the recipe, but I thought it added a nice little zing to the cheese.

After 30 minutes, preheat the grill to medium.  Pour off the vinaigrette and reserve it.

Grill the yellow pepper and onion for 7-10 minutes, flipping halfway through.  Cook the zucchini for 5-7 minutes or until crisp tender, flipping halfway through.  Cook the tomatoes for five minutes or until the skin starts to char.

Once the vegetables are done, cut them all into bite size pieces.  Place some torn romaine lettuce on a platter and toss it with the reserved vinaigrette dressing.  Place the diced vegetables on top.

 Sprinkle the cheese cubes on top of everything and serve the salad. 

There you have it!  If you think the idea of having grilled vegetables atop lettuce is bizarre, feel free to omit the lettuce and just make it a grilled vegetable side dish.  Either way, the result will be tasty.

And please, don't force your kids to eat this or watch presidential documentaries.

Tuesday, November 29, 2011

My Favorite Baked Beans

 Okay...  I have made several kinds of baked beans, but these are, by far, the most ridiculously delicious that I have ever tasted.  We had some friends over for dinner a while back and made pulled pork.  What better to go with pulled pork than baked beans?  I busted this recipe out, and here are a few comments:

"Dude... Is this bacon cake?  This looks amazing!"

"Umm..  These are definitely better than the canned ones that I was going to bring."

mmmmmm....

I love the first one.  Bacon Cake.  Oh, yes.  If you have a loved one in your life that loves bacon, whip this out and throw a couple candles on top.  Best birthday ever.  These beans are out of sight, and they wer almost completely devoured before I got a picture.  Thankfully, I could snap one while there was still a little bit left. 

The next time you grill anything, make these.  If you're a baked-bean person, they shall render you speechless.

Baked Beans

8 bacon slices, halved
1 onion, chopped
1/2 red pepper, diced (the original called for a green pepper, but I like red way better)
3 28 oz. cans of pork and beans
3/4 c barbecue sauce (I used cattleman's Kansas City)
1/2 c brown sugar
1/4 c cider vinegar
2 t dry mustard or 2 T dijon mustard

Cook the bacon according to package directions until the bacon starts to brown around the edge and there is about 1/4 c bacon fat in the pan.  Remove the bacon and drain on paper towels.  Set aside.

Add the diced onion and red pepper to the bacon drippings and saute over medium-high heat for about five minutes. 

Add the beans.

 Add the remaining ingredients.  Stir.  Heat the ingredients to a simmer.
Pour the bean mixture into a 13x9 pan.  

 Top it with the bacon slices.  Bake it at 325 on the lower-middle rack for two hours.  That is not a typo!  After two hours, the liquid will start to evaporate and create this syrupy goodness that coats the beans.  It's magical. 
 Remove the beans and let the groans begin. 
Two words:  Bacon.  Cake.

Friday, September 16, 2011

Parmesan Red Potatoes

You know that song that goes Lollipop, lollipop, oh, lolli, lollipop."  Well, let us change the words for a moment but keep the tune the same. 

Parmesan, Parmesan, oh, Parmesan Taters. Down right delicious.  If you've got some extra red potatoes, and you want to do more than the same ol' boiled potatoes, this is a good alternative.  They had great flavor.  I mean, I didn't even have to drench them with sour cream and salt and pepper to eat them.  Now, that's saying something.  I didn't even add butter.  Hot dog! 
 Parmesan Red Potatoes
Taste of Home Cookbook (the green one)

12 small red potatoes
1/2 Parmesan cheese
1/2 c olive oil
2 T fresh minced parsley
1 T capers, drained
1 T thinly sliced green onion
1 t white wine vinegar (I just used white cooking wine)
1/4 t pepper

Preheat the oven to 450.

Put water in a large saucepan and bring it to a boil.  Wash the potatoes and cut them into bite size chunks as seen below.  Place them in the boiling water and boil them for 12 minutes. 

While they are cooking, combine the remaining ingredients in a bowl.

When they are done, they should be almost completely cooked. Place them in the cooking dish.
 Pour the oil and Parmesan mixture over the potatoes.
 Toss it all together to evenly coat the potatoes. 
 Bake them for ten minutes. Take them out and make this sound when you take your first bite: arghauhrgahgrh (Homer Simpson drooling sound)