Tuesday, August 31, 2010

Sweet Heat Salsa

I so wish I could take credit for creating this recipe. I love salsa. I'm one of those crazy people at a Mexican restaurant that can down a whole bowl of salsa in five minutes flat. I love the stuff. I think it is glorious. I have never found a recipe that has completely wowed me. Until this one. It's from the Pioneer Woman website. I hope wonderful things come to that woman for posting this recipe. I love it. It is the perfect consistency for me, and the flavor is dynamite. As for the name of the salsa, I give my brother credit for that one. I took it over to my mom's house for Sunday dinner, and he said, "Man, this is like Sweet Heat salsa. It's sweet but it has some bite, too." I liked the sound of that. Well, here it is. Oh- He liked it so much, he took this picture of it for me. He works for a photography company, so his awesome camera takes way better pictures than my cool little Sony Cybershot.
Sweet Heat Salsa:
14 oz diced tomatoes
10 oz Ro-Tel tomatoes (I used the ones with cilantro)
1/4 c onion
1 clove garlic
1 jalapeno, seeded and veined
1/8 t each sugar, salt, and cumin
1/4 c cilantro
1/2 lime, juiced

Put all of that into a blender. If you like more heat, keep the veins and/or seeds. Put the lid on and pulse until it's at a consistency you like. Chill for an hour.

I'm telling you. These ingredients are a match made in heaven. For me, it's the perfect salsa. Thank you Pioneer Woman. I owe you one.

Chocolate Chip Pancakes

I meet so many people that say they don't like pancakes. Wha?! I then ask what kind of pancakes they've had, and the majority of them say, "Bisquick Pancakes." Well, no wonder! I don't even classify those things as pancakes. You may as well mix a bunch of flour and baking powder together and add a little water to hold it together and call that a pancake. Ew. Homemade pancakes are where it is at. I love the skinny pancakes I've posted on here, and these chocolate chip pancakes are right up there, too. I have another chocolate chip pancake recipe as well, but I'll just this one up here for now. It really is delicious. The great thing about it is that the recipe is right on the back of Saco Powdered Buttermilk. All I do is add chocolate chips and Cool Whip. Mmm, mmm, good. So, if you make Bisquick pancakes, please spare your family the breakfast biscuit and make some real tasty pancakes that everyone can love. :D
Chocolate Chip Pancakes:
1/4 c SACO powdered buttermilk
1 c flour
1 T sugar
1 t baking powder
1/2 t baking soda
1/4 t salt
1 egg
1 c water
2 T vegetable oil
chocolate chips
Cool Whip

Mix all ingredients together in a mixing bowl and stir to combine.
This is the buttermilk. You can find it in the baking aisle by the powdered milk, flour, and sugar.
Heat the skillet to medium heat. Do not overstir the batter. Mix just until blended.

Pour into four circles on the heated griddle. If you like the pancakes a little toasty, you can put butter on the griddle first. I don't use the butter because I like them soft. While they are cooking, sprinkle on some chocolate chips. I used mini ones today, but you can use regular if you'd like.


Cook until the underside is golden brown. They take about 20-30 seconds to cook. When you flip them, they should look like this:

Cook the other side for another 20-30 seconds or until golden brown on the under side. Stack 'em up. Eat 'em up!

I add Cool Whip onto mine. My son just likes syrup. Then again, he's kind of like Buddy the Elf and would probably eat syrup on spaghetti noodles.
This picture is to show you the tenderness on the inside. They are so soft and fluffy. The two bottom pictures are my kids' plates after having two pancakes. They scarfed those things down in no time flat! No more complaints that pancakes are nasty. Try these out. :)

Friday, August 27, 2010

"Juicy Lucy" hamburger

My husband and I were watching "Man Vs. Food" one night, and the host was trying out two different restaurants that both claimed to have started the "Juicy Lucy." Well, wait. What is a Juicy Lucy, you ask? It's a hamburger with American cheese slices stuck between two thin patties. I don't remember which restaurant was deemed the best. All I remember is salivating during the show and wanting a Juicy Lucy. Well, it wasn't long before my husband was in the kitchen busting these out. They are ridiculously delicious. Something magical happens to that cheese when it is stuck between two patties. This has revolutionized hamburgers for me. Just look at this picture. That melty cheese oozes out of the cheeseburger with every bite. Oozy cheese is a definite plus for me. My favorite hamburger place Fuddruckers has a nacho cheese dispenser, and I always loved the thought of putting oozy cheese on a hamburger. It just tastes better. Now, no cheese dispenser required! Just follow this recipe and you'll be in a hamburger wonderland in no time.

Juicy Lucy:
ground beef
American cheese slices
seasoning
hamburger buns
toppings

This is so simple. I love it. Make two thin patties. Season them with whatever you'd like. My husband did seasoned salt and freshly ground pepper. Take one piece of American cheese and break it into four smaller squares. Put them on top of a patty.


Take the second patty and place it on top. Seal around the edges so as much of that cheesy goodness stays in as possible.
Repeat the process until you've done as many as you need. We cooked ours on the stove in a frying pan. That is delicious, but it would work on the grill as well. Cook them on medium heat until no longer pink in the middle, about ten minutes. My husbands words, "I don't know... a few minutes per side until it looks right." There you have it. :)

While they are cooking, you can toast some buns... hamburger buns that is. I buttered them and sprinkled them with Worcestershire flavored pepper. McCormick sells it. I toasted them on a hot griddle over medium-high heat until they were light brown.


Keep on eye on the hamburgers, too. This was close to completion for us. Do you see the cheese peeking out of the hamburger. Ridiculous. My two little ones just prefer regular cheeseburgers. Crazy kids!

Once they are done, have a variety of topping: lettuce, pickles, sauteed onions, tomatoes, ketchup, mustard, mayo, or whatever else you fancy. My husband says that his dream combination is ranch, spicy brown mustard, sauteed onions, and Claussens garlic pickle slices.

Do you see what I see here? I'm telling you. Once you try this, I can't for the life of me figure out why any one would not make it this way. It's takes a little more time to prepare, but if you read this regularly, you know that I choose taste over convenience. This is one example of that. :) Go make them and enjoy your Juicy Lucy!

I served this with corn on the cob and fruit kabobs. Baked beans and potato salad would be golden as well.

Kielbasa Calzone

This is another recipe that I created to use up what I had in my kitchen. My husband and I thought it turned out delicious. If you're not a kielbasa fan, you probably won't use this, but the possibilities for filling are endless.
  • Mozzarella, pepperoni, olives
  • Canadian bacon and pineapple
  • Ham and Swiss
  • taco filling and cheddar
I could go on and on. This is one of those easy to make and delicious to eat recipes. Here's a picture of what I whipped up:
Once again, this is a really easy recipe.

Kielbasa Calzone:
1 loaf frozen dough, thawed (I used Rhodes)
Kielbasa sausage
2 T olive oil
1/3 c chopped onion
1/4 c tart apple, cored, and chopped into small pieces
3/4 c cheddar cheese
2 T dijon mustard
1 egg yolk
sesame seeds

Put the oil in a skillet and heat over medium-high. Add the kielbasa, onion, and apple. For the Kielbasa, I used half of the package. I didn't have an apple when I made this last night, but I have used it before. It's really good with a little apple in there. Saute for about 5-8 minutes.

Turn off the heat and let it sit in the pan while you prepare the bread. Use a rolling pin to roll the bread into a rectangle of 12x10ish. Brush the dijon mustard on it. Add the cheddar cheese to the middle third of the bread. I used thin slices, but shredded works fine, too.

Top it with the kielbasa, keeping it all in the middle of the rectangle.

Fold the sides over the kielbasa. Make sure you press all edges together to seal it. If you don't, you're going to have an onslaught of juicy juices coming out of the calzone. Brush all showing sides of the calzone with the egg yolk. Sprinkle it with sesame seeds.
Bake it in a 350 degree oven for 30 minutes. When you take it out, it will be a nice golden brown.

Slice it and serve.

I have served this with loaded mashed potatoes, a green salad, and some sort of fruit side.

Wednesday, August 25, 2010

Garlic Knots

Since I started this little blog, I have been perusing other food blogs as well. It's a dangerous world out there! I could literally spend hours looking at sites and finding recipes I cannot wait to try. This is one of them. I found them at this site:
http://amberskitchen.blogspot.com/2008/10/knots-from-heaven.html
She entitled them "Knots from Heaven" and I second that! These things were ridiculous. I think I saw an angel float down and place one on my plate while the other angels sang a chorus of Hallelujas. I could eat them with every meal. The were soft and pillowy (add that word to my dictionary of made up words.) The garlic/butter/herb mixture on the outside was just the right touch to an already perfect roll. I am so happy that I found this recipe. I don't know Amber of Amber's kitchen, but if she's got recipes like this, I thinks she rules! I hope your family can enjoy them as much as mine did. They really are simple to make and very simple to put together. If you're afraid of making homemade bread... there's no need! Just try it. Then, you too, can have a piece of heaven along with your dinner. I mean, come on, how often do angels put food on your plate... really? :)

Garlic Knots:
adapted from amberskitchen.blogspot.com (see link above)

Ingredients
Dough
3 c bread flour ( I used all purpose and they were still wonderful)
1/4 c milk
1 T sugar
2 t instant yeast
1-1/4 t salt
2 T olive oil
1 c + 2 T lukewarm water
Glaze
2-4 cloves garlic, minced
2 T melted butter
1/4 t Italian seasoning, optional

I put all the dough ingredients right into my bread machine and put it on the dough setting. So simple! If you don't have a bread machine, put it on your Christmas list, and then follow the remaining instructions. Add the dry ingredients into a stand mixer. Use the dough attachment if you have it. Add the remaining ingredients. Let it mix until it is smooth looking. Take it out, put it in a greased bowl, cover it, and let it rise in a warm place for about an hour.

Once it's done, break it up into 8 pieces. I did about 10 pieces to make some smaller rolls, and I think I liked the smaller ones better. If you want to do smaller rolls, break the dough into 12-15 pieces.

If you have little helpers in the kitchen (children, not munchkins), they love this next part. Roll the dough into snakes. Woohoo! They need to be about 8-10 inches long. My daughter had so much fun with this.

Continue with all the wads of dough. Now you have a snake battalion.


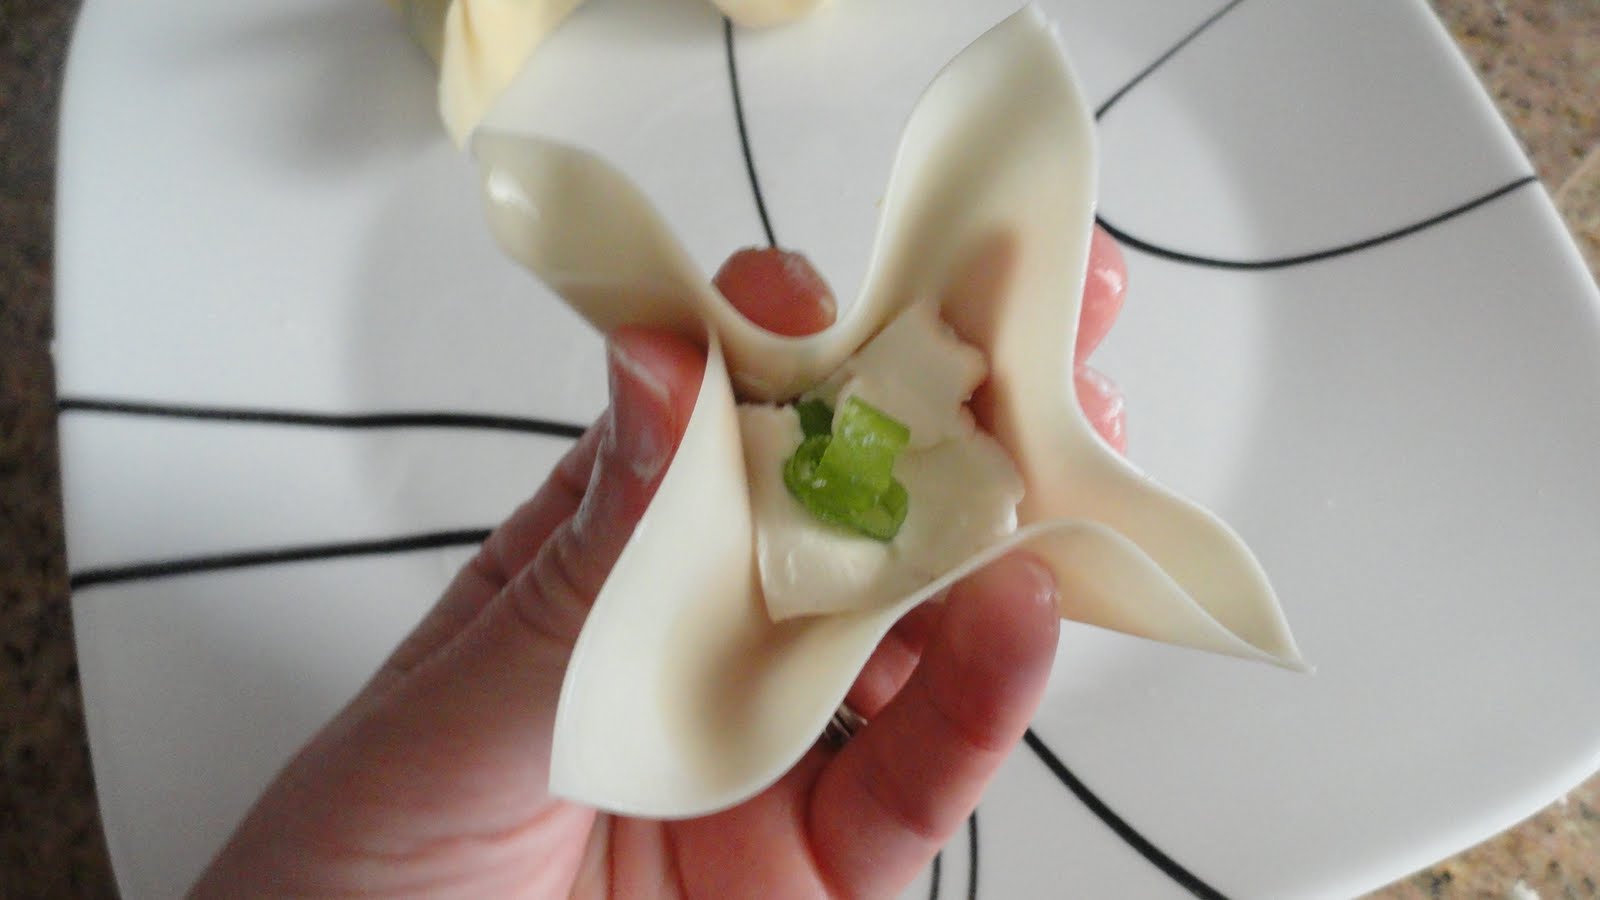
Now, you will make the knots. Don't be scared. it's really quite simple. I tried taking a picture after each step so it could be more clear.


Step 1 (above): Make a fish out of the dough. It's clear that I'm an elementary school teacher.

Step 2 (top right): Take the dough hanging off to the left and push it under and up through the middle.

Step 3 (right): Take the dough piece hanging off to the right and bring it over the top, through the middle, and tuck it under.

Place the rolls on a lightly greased cookie sheet. Let them rise in a warm place until doubled in size. Mine were in the microwave with a bowl of hot water for about 30 minutes.


I think mine got a little too puffy, but they started like the picture on the right and ended up like the picture on the left. I think if I used bread flour, they would have risen a bit differently. I'll find out next time I make them. Nonetheless, they were delicious.

Bake them in a 350 degree oven for 15-18 minutes.

While they are baking, prepare the buttery, garlicky, herby goodness that gets brushed on top.

Melt the butter in a small bowl or a ramekin (isn't that a fun word to say?) I have a garlic press, so I used that to mince the garlic. If you don't have a garlic press, you can chop it up, put it in a food processor, or use the pre-minced garlic in water. Do not use garlic powder or garlic salt to substitute. It's got to be real garlic chunks. Once the garlic is in, add the Italian seasoning. Stir it up.


Once they come out of the oven, the will be very light in color. Brush them with the butter stuff, and you'll start to hear the Hallelujah choir chime in. They are divine!


They aren't as knotty as I'd like, but I'll take these buttered, garlic, herb blobs any day of the week.


Here are some pictures from the inside texture.


It's brings a tear to my eye. Lovely. I think devouring these rolls alongside some pasta with homemade sauce should be on everyone's bucket list. :)

Again, thank you Amber from Amber's kitchen for sharing this delightful recipe!

Tuesday, August 24, 2010

Hot Fudge Pudding Cake

This recipe is a classic! This brings back memories of cold winter nights, and the smell of this would waft through the house while I was bundled up on the couch watching movies. My mom used to make this all the time, and I am thrilled to be making it for my own family now. The thing I love about this recipe is that is fulfills so many cravings. I want something... cakey. I want something... fudgy. I want something.... puddingy. I want something... with ice cream. Check. Check. Check. Check. Problem solved. And do not leave this for a cold winter night. I just made it in Las Vegas at the end of August. Do you know how hot it got today? Probably about 107 degrees. Guess what? This recipe is just as good on a hot summer day.

Sorry I don't have any more photos. I was in a hurry to make it, so I just got the after shots.

Just to be sure... Do you see that fudgy stuff... yeah. That is how this recipe comes out. Cake on the top and fudge on the bottom. I think a kitchen magician created this recipe.

Hot Fudge Pudding Cake
from Favorite Brand Name Best-Loved Recipes of All Time

1 1/4 c sugar, divided
1 c flour
7 T cocoa, divided
2 t baking powder
1/4 t salt
1/2 c milk
1/3 c butter, melted
1 1/2 t vanilla
1/2 packed brown sugar
1 1/4 c hot water
Ice Cream

Heat oven to 350 degrees.

Stir together 3/4 c sugar, flour, 3 T cocoa, baking powder and salt. Add the milk, melted butter, and vanilla. Stir it smooth. Pour it into a 8 or 9 inch square pan or something similar. You could probably use a circular or oval pan, but I'm not very good at converting square pan dimensions to circular pans. If you have a triangular pan, you're outta luck.

Combine the remaining sugar, the remaining cocoa, and the brown sugar. Sprinkle it over the batter. Pour the hot water over the top. Do not mix! Bake it for 40 minutes. Let it rest for about ten minutes. This is what you get. What's even more miraculous than this recipe is...
This! Within a matter of minutes, it all disappears. Dang! Where did it all go? Maybe I'll ask my husband. :) This is a family classic that will never die. Live on Hot Fudge Pudding Cake!
Just for the record, my husband is the best. Without him, I wouldn't have someone to give me support and encouragement for this.

Cream Cheese Rangoons

One of my favorite things to get at a Chinese restaurant is rangoons. Oh, they are crispy. They are creamy. Mmmm.... I could eat a whole plate of these by myself. They really are easy to make, so get some wonton wrappers and get on it!
Cream Cheese Rangoons:
Wonton wrappers (these can be found by the sprouts, mushrooms, and bagged salad in the grocery store)
Cream cheese
green onions

Let the adventure begin! Place a wonton wrapper on a flat surface and brush it with whatever paintbrush you have laying around the house. ;) Use a pastry brush. Brush around the edges.

Use a knife to get a heaping teaspoon-sized hunk of cream cheese. Plop it in the middle and sprinkle a couple green onions on top. Oh- If you're feeling fishy, you can add some imitation crab with the cream cheese. If you have money to spend on real crab, heck, go all out and throw some of that in.


Squeeze the corners together as shown. It's kinda hard to explain. See below.


Press all the edges together to seal it. The water will help with that. Be gentle with these little guys though. They can tear easily.


Once they are all pressed together, they will look like the picture above. Fry those bad boys in some oil. If you are making the sweet and sour chicken that I posted, you can use the same oil for these. When you drop them in, the oil should bubble all around them. Once they are golden brown and delicious looking as in the first picture, take them out and drain them on a paper towel lined plate. Serve them with sweet chili sauce (in the Asian section of the grocery store) or the homemade sweet and sour sauce I posted.

For those that don't like the idea of deep frying your whole meal- these can be baked, although the are much better all crispy and fried. If you want to bake them, place wonton wrappers in muffin cups. Stir the cream cheese and green onions together and put little dollops (I've always wanted to use that word) into the wonton wrappers. Bake at 375 for 8-10 minutes. Keep on eye on them. Once their edges are lightly browned, they're done! there. See? A kinda healthy version. :D

Sweet and Sour Sauce

One of my roommates in college made this and shared the recipe, so unfortunately, I am unable to cite the source other than "a roommate." It's been a few years. After making this sauce, I haven't bought bottled sweet and sour sauce. I still get that sweet chili sauce though. I have no clue how to duplicate that glorious condiment. As for this sauce, it doesn't look like your traditional sweet and sour sauce because it's made with all ingredients we can pronounce. It doesn't have any red food coloring or glucsoliodium binitrodinrosphorus. Yes, I made that up. Back to the point. When my brother first saw it, he was hesitant because it was watery and bright red; However, his attitude quickly changed when he tasted it. "Dang! This is good!" Yeah, that's right. Back off my not-so-red sweet and sour sauce. Another difference is the presence of chunks. Personally, I love the added pineapple, carrots, and red pepper. If you're not a fan of chunky sauces, leave them out. Bam! You still have a delicious, homemade sauce.Sweet and Sour Chicken

Batter:
1/2 c flour
1/4 c cornstarch
1/2 c cold water
1/2 t salt
1 egg

Sauce:
20 oz pineapple chunks in syrup
1/2 c brown sugar
1/2 c white vinegar
1/2 t salt
2 teaspoons soy sauce
1 medium carrot, thinly sliced or grated
1 clove garlic, minced
2 T corn starch
2 T cold water
1 medium red pepper, cut into 3/4 inch pieces

Chicken in 1 inch cubes
Oil for frying

I had company come for dinner tonight, so I only have the one picture. Sorry! This is such an easy recipe, that you can probably do it without the tutorial pictures.

Pour oil in a saucepan to a depth of about 3 inches. Heat it over medium-high heat.

Prepare the sauce. Drain the pineapple syrup into a cup measuring cup. Add enough water to make one cup. Put it in a saucepan. Heat the syrup mixture, brown sugar, white vinegar, salt, soy sauce, and carrots over medium-high heat until it comes to a boil. Reduce the hear to medium-low. Cover and simmer for 6 minutes. Mix the corn starch and water. Stir it into the sauce. Add the pineapple (I like to cut it into smaller chunks) and red bell pepper. Heat to boiling; stirring constantly. Bowl and stir one minute more. Reduce the heat to low and let simmer until the meal is ready.

Combine all the batter ingredients in a bowl. Dip the cut chicken into the batter and drop it into the heated oil. Sometimes I will take a little bit of the batter on my fingers and let it drop into the oil to make sure it is hot enough. If it is hot enough, the oil will rock and roll around the drop. Let the chicken cook in the oil for about 10 minutes or until golden brown. I do about 12 pieces at a time in my pan. When it is done, drain it on a paper-towel lined plate. Transfer the chicken pieces to a cookie sheet and keep in a 200 degree oven until ready to serve.

Put the sweet and sour sauce over the chicken.

I serve this with the fried rice, cream cheese rangoons, and steamed vegetables. The rangoons and rice are posted on here, too.

Fried Rice

I will apologize in advance for not taking any more pictures that this. Usually, I do. However, we had company over tonight, and I had about 80 things going on at once. You're lucky to get any pictures. :) This fried rice is really good, and I thought you might enjoy the recipe. Here she blows...

Fried Rice:
2 T vegetable oil
1/4 c chopped onion
1 clove garlic, minced
1/2 t ground ginger
3 c cooked rice
1 T soy sauce
2 eggs, lightly beaten
1/3 c frozen peas
1/4 c shredded carrot or little carrot cubes
1/2 c diced ham

Heat the oil in a wok or large frying pan over medium-high heat. Add the onion, garlic, and ginger. Saute for 2-3 minutes. Add the cooked rice and soy sauce. Stir around and cook for another couple minutes. Make a well in the middle of the rice and add the beaten eggs. Lightly scramble them until the are completed cooked. Mix the cooked eggs in with the rest of the rice. Add the peas, carrot, and ham. Cook over medium heat, stirring occasionally until the peas, carrots, and ham are heated through- about ten minutes.

You can also use chopped pork, mini shrimp, or any other kind of meat that goes well with fried rice. It's a simple recipe, but it's a good'n.

I'm anything but Asian, so I don't have all the skills they have, but hey! You can eat this and unlike a post-Panda Express dinner, you won't be sick to your stomach for four hours. :)

Sunday, August 22, 2010

Magically Moist Chicken

When I was first married (7 years ago), I found this recipe in a cookbook. It was easy, and back then, I could barely make a chicken quesadilla so I needed something easy. Even my brother calls me every once in awhile to use it to make chicken parmesan. It's a great recipe. I have modified a little bit since I like homemade bread crumbs as opposed to the small, hard, and crunchy store bought ones. Here's the picture and the recipe.


Magically Moist Chicken:

2 chicken breasts
1/4 c mayonnaise
1 c soft bread crumbs
3 T Parmesan cheese
1 t Italian seasoning

That's it! Woohoo!

Preheat your oven to 400 degrees.

Brush the chicken breasts with mayonnaise. Have you heard that term, "The secret is in the sauce?" Well, I think the secret to moist baked chicken in the sauce (mayo.) Brush both sides with mayonnaise.


Prepare to make bread crumbs. If you don't have some kind of a food processor, you are missing out! I love mine to pieces. Sometimes I put it next to my pillow at night when my husband stays up to watch Lord of the Rings for the umpteenth time. ok- I don't really sleep with the thing, but I do love it. Go into your cupboard and find some stale bread. We've all got it somewhere. I prefer white bread. Next time you say, "Dag Nabit! My buns went stale again," you'll have a use for them. Break the bread into smaller pieces and put them in the food processor.


Close it and pulse a few times until you get this:


Add your Parmesan cheese and Italian seasoning. Put it all in a shallow dish or a bowl. Place one chicken breast at a time in there and coat it.


Place the breasts on a greased sheet. I usually put a rack under the chicken so the bottom doesn't get burnt. I wasn't thinking today. My kids were running a muck, and I was trying a couple new recipes all at the same time. AHH! The wire rack underneath does make a difference. The bottom stays nice and golden.

Once they are all on the sheet, bake them for 30 minutes. If the crumbs start to brown too quickly and burn, tent some aluminum foil over the chicken.

I usually serve this with wild rice, a vegetable, and some bread.

For Chicken Parmesan, use the spaghetti sauce I have already posted in the pasta section. Cook the chicken. While it's cooking, prepare some spaghetti noodles. When the chicken is done, take it out and place it on a bed of cooked spaghetti noodles. Top with the spaghetti sauce and some mozzarella cheese. Place it back in the oven just until the cheese is melted. Sprinkle with parsley and a little more Parmesan cheese. Mmm...mmm...good. Fancy Pants.